Cloudflare Tunnel and teams Link to heading
A few months back I decided to play around with cloudflare teams and tunnel. I’ve been wanting to test this out and see how easy it is to run such tunnels.
This would be useful for when I decide to work overseas while still being able to access my home devices (ie. Raspberry Pi / Mac Mini) as if I never left the house.
The magic of Cloudflare Link to heading
Cloudflare argo tunnel or Cloudflare tunnel allows anyone to easily and securely expose internal services / application to the public.
If you are a developer, you will love Tunnel since it allows ease of collaboration / demo without having to be slowed down by the operations team waiting for them to set up and configure the infra. This assumes that you have a domain and is managed by Cloudflare.
Setup Link to heading
On the hosting machine Link to heading
This could be a raspberry pi or your computer at home. In this example, we will expose the SSH service on my mac with zero trust security.
- Install the cloudflared binary using brew.
brew update brew install cloudflare/cloudflare/cloudflared cloudflared version which cloudflared - Authenticate with your cloudflare account. This will launch a browser. If it doesn’t, just click on the link shown in the output of the command.
 Figure 2.1. cloudflared tunnel login cli
 Figure 2.2. select the domain to use for cloudflare tunnel
 Figure 2.3. authorizing cloudflare tunnel
 Figure 2.4. cloudflare tunnel success
 Figure 2.5. cloudflared tunnel list command output
 - Create a tunnel and verify. This will generate a credentials file in the
/$HOME/.cloudflareddirectory. DO NOT delete it. Figure 3. cloudflared tunnel creation and output list of tunnels
 - Create a configuration file in the
/$HOME/.cloudflareddirectory. Thisconfig.yamlfile will instruct cloudflared which tunnel to use and what application we are exposing.vim ~/.cloudflared/config.yaml Figure 4. cloudflared config.yaml file
Refer here for in depth explanation of the ingress rules. - Create the CNAME record that points to the tunnel subdomain with the following command.
 Figure 5.1. create CNAME to tunnel
 Figure 5.2. cloudflare DNS page showing the recently created CNAME record
 - Start the tunnel
 Figure 6. cloudflared tunnel run command
On CloudFlare Link to heading
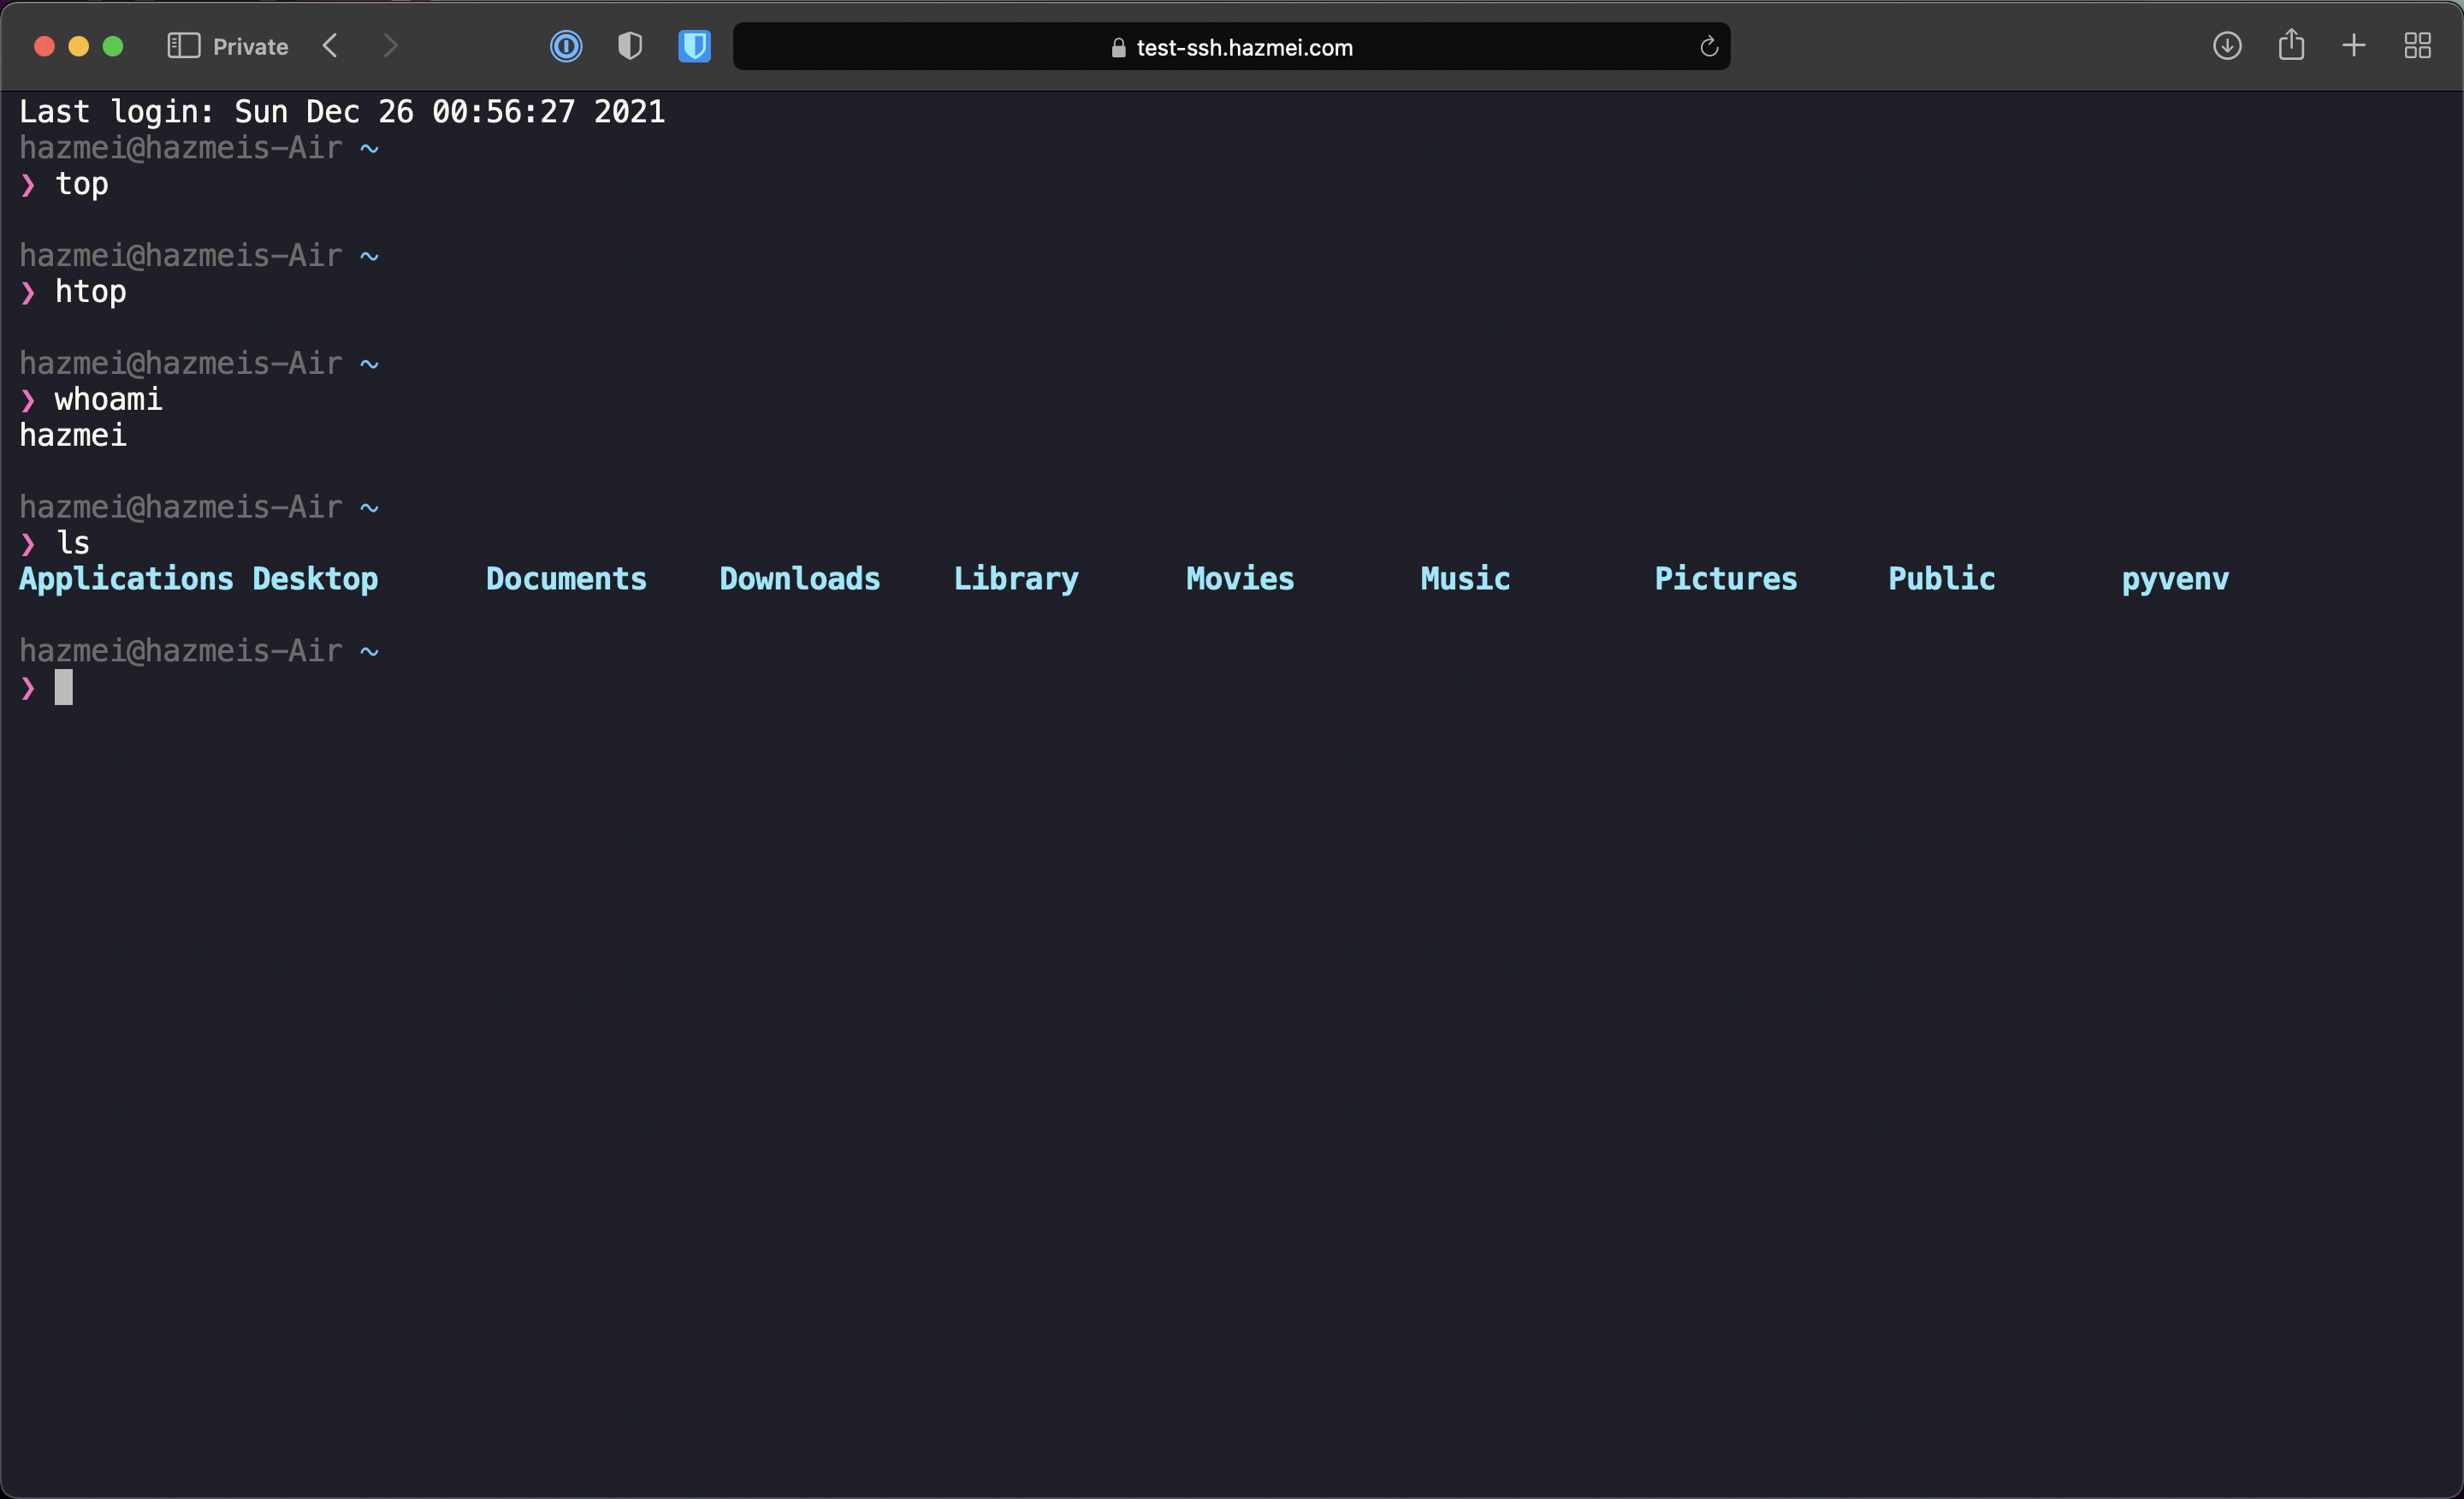
We have now exposed SSH from our virtual machine to the internet. Now let’s secure the access by limiting it to only authenticated users with CloudFlare Access.
- Head to the teams dashboard (Access > Launch Teams)
 Figure 1. cloudflare access page
 - Go to Access > Applications
 Figure 2. cloudflare for teams page
 - Click on
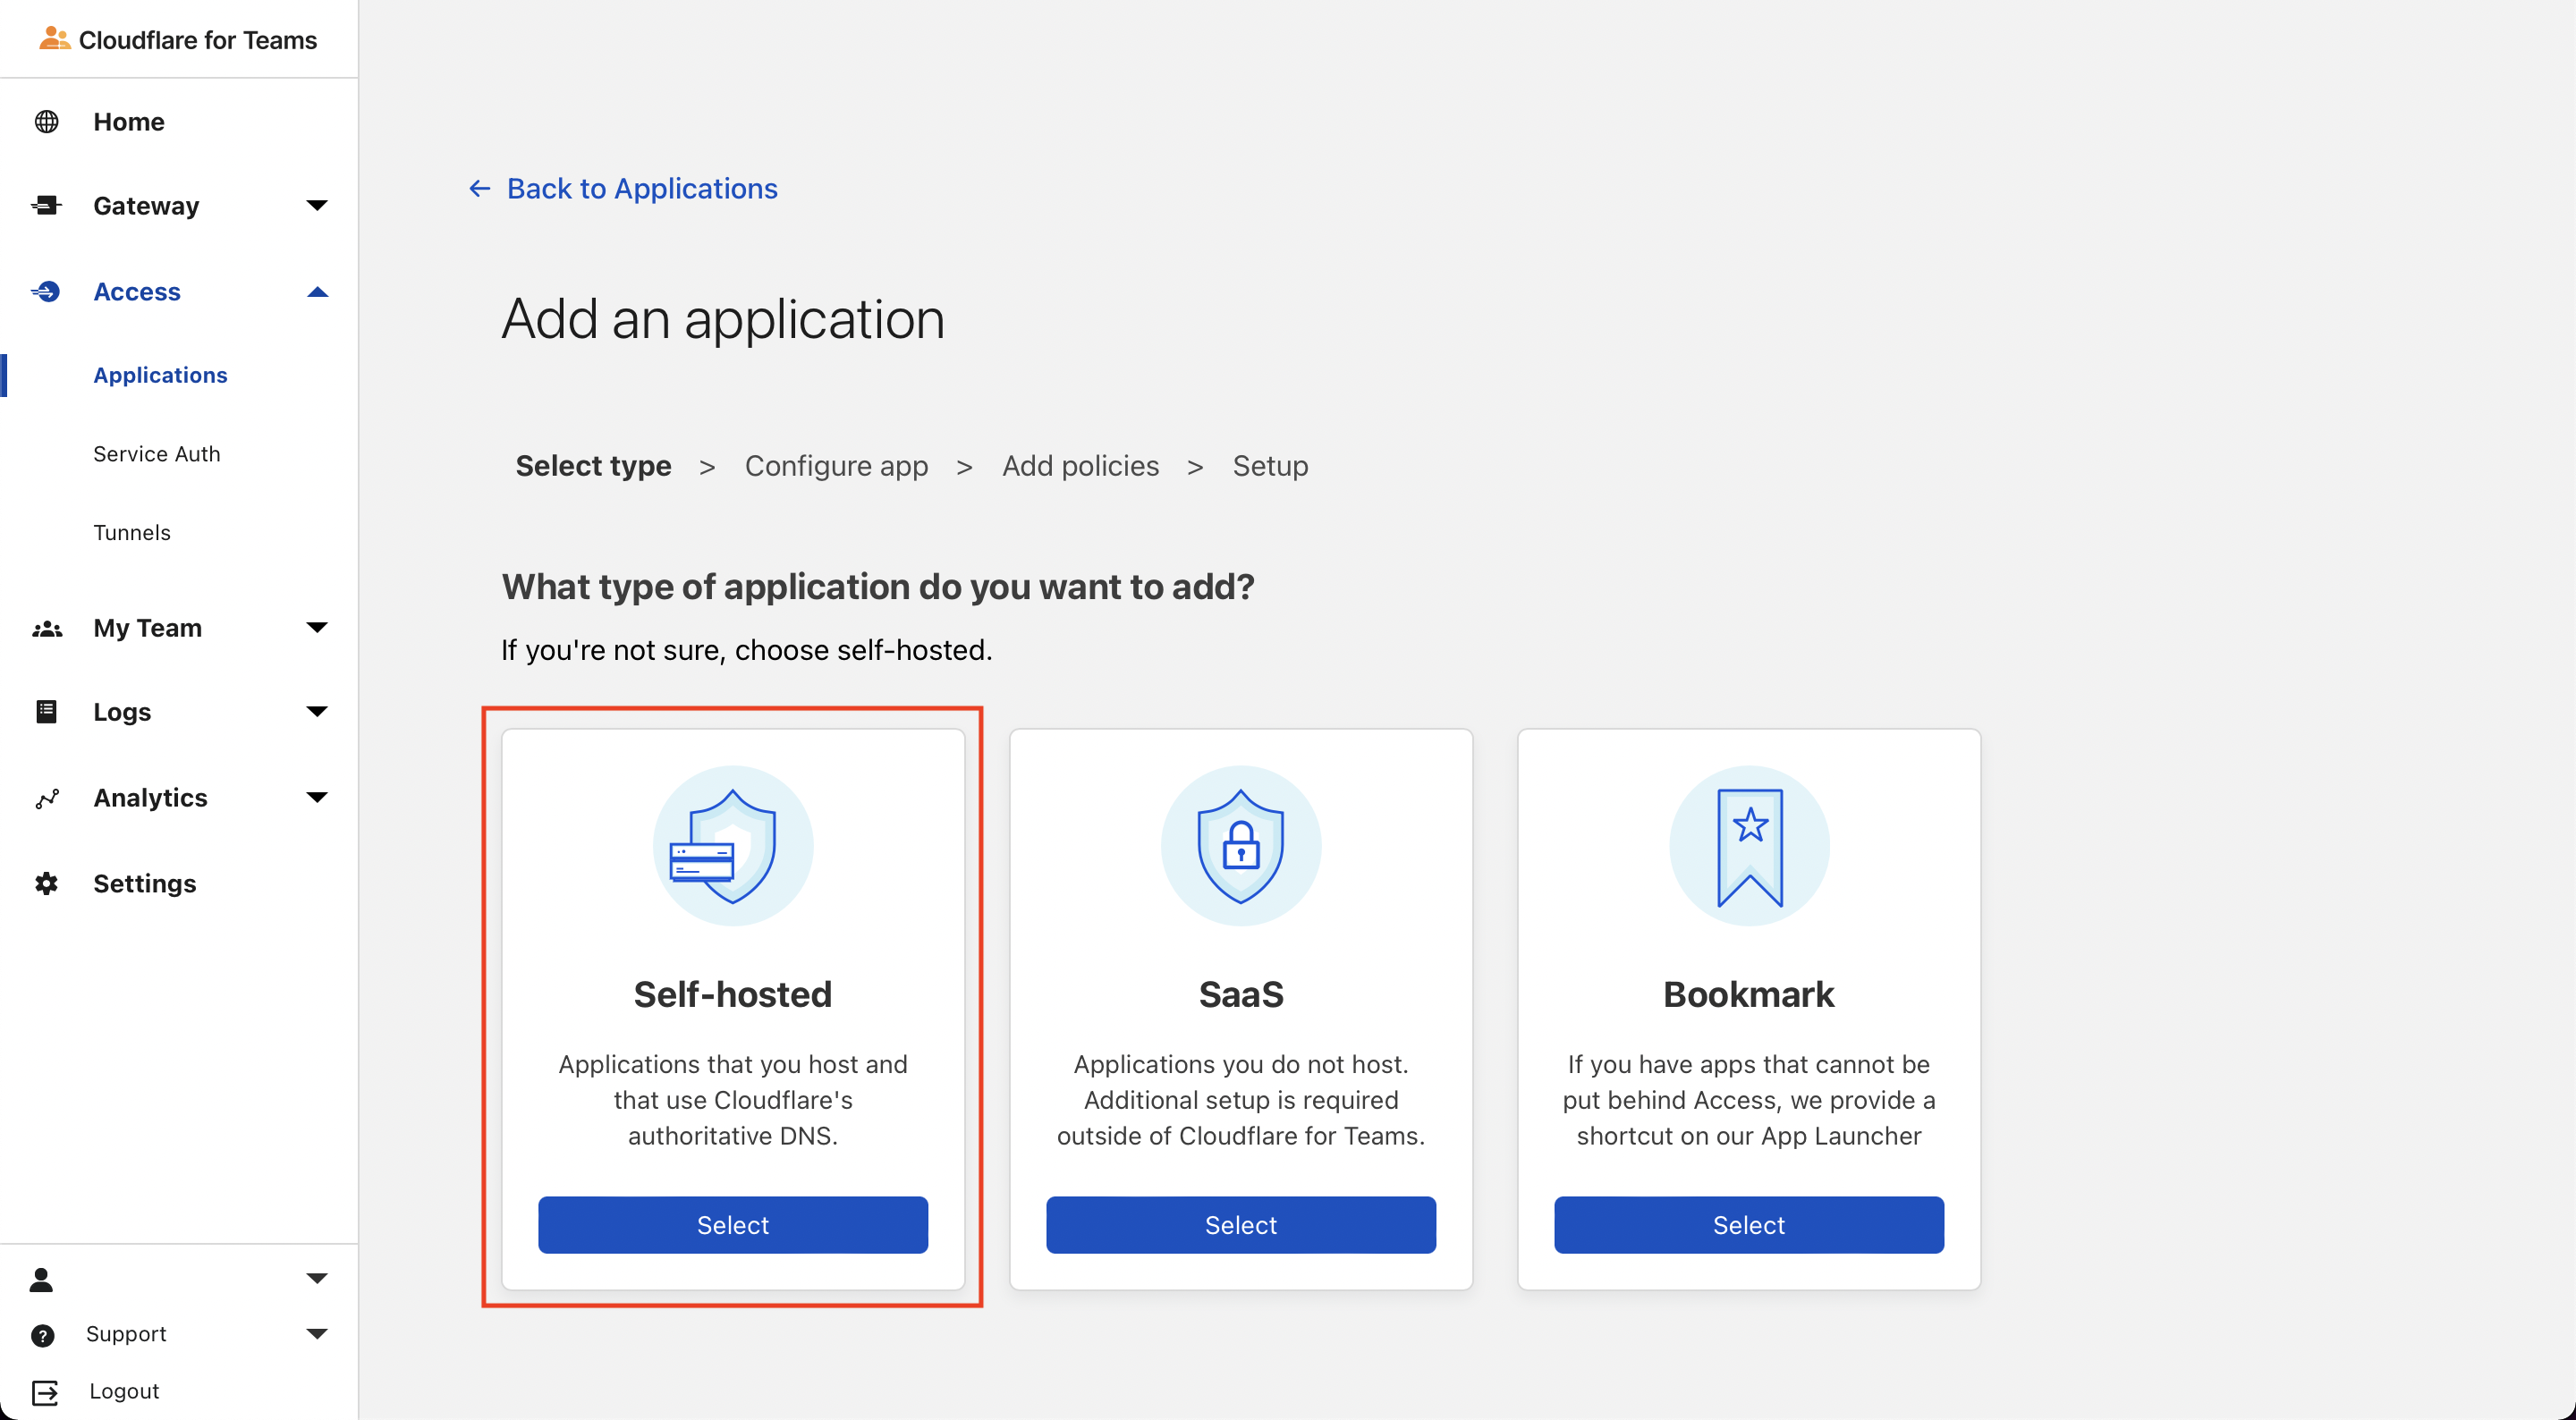
Add an application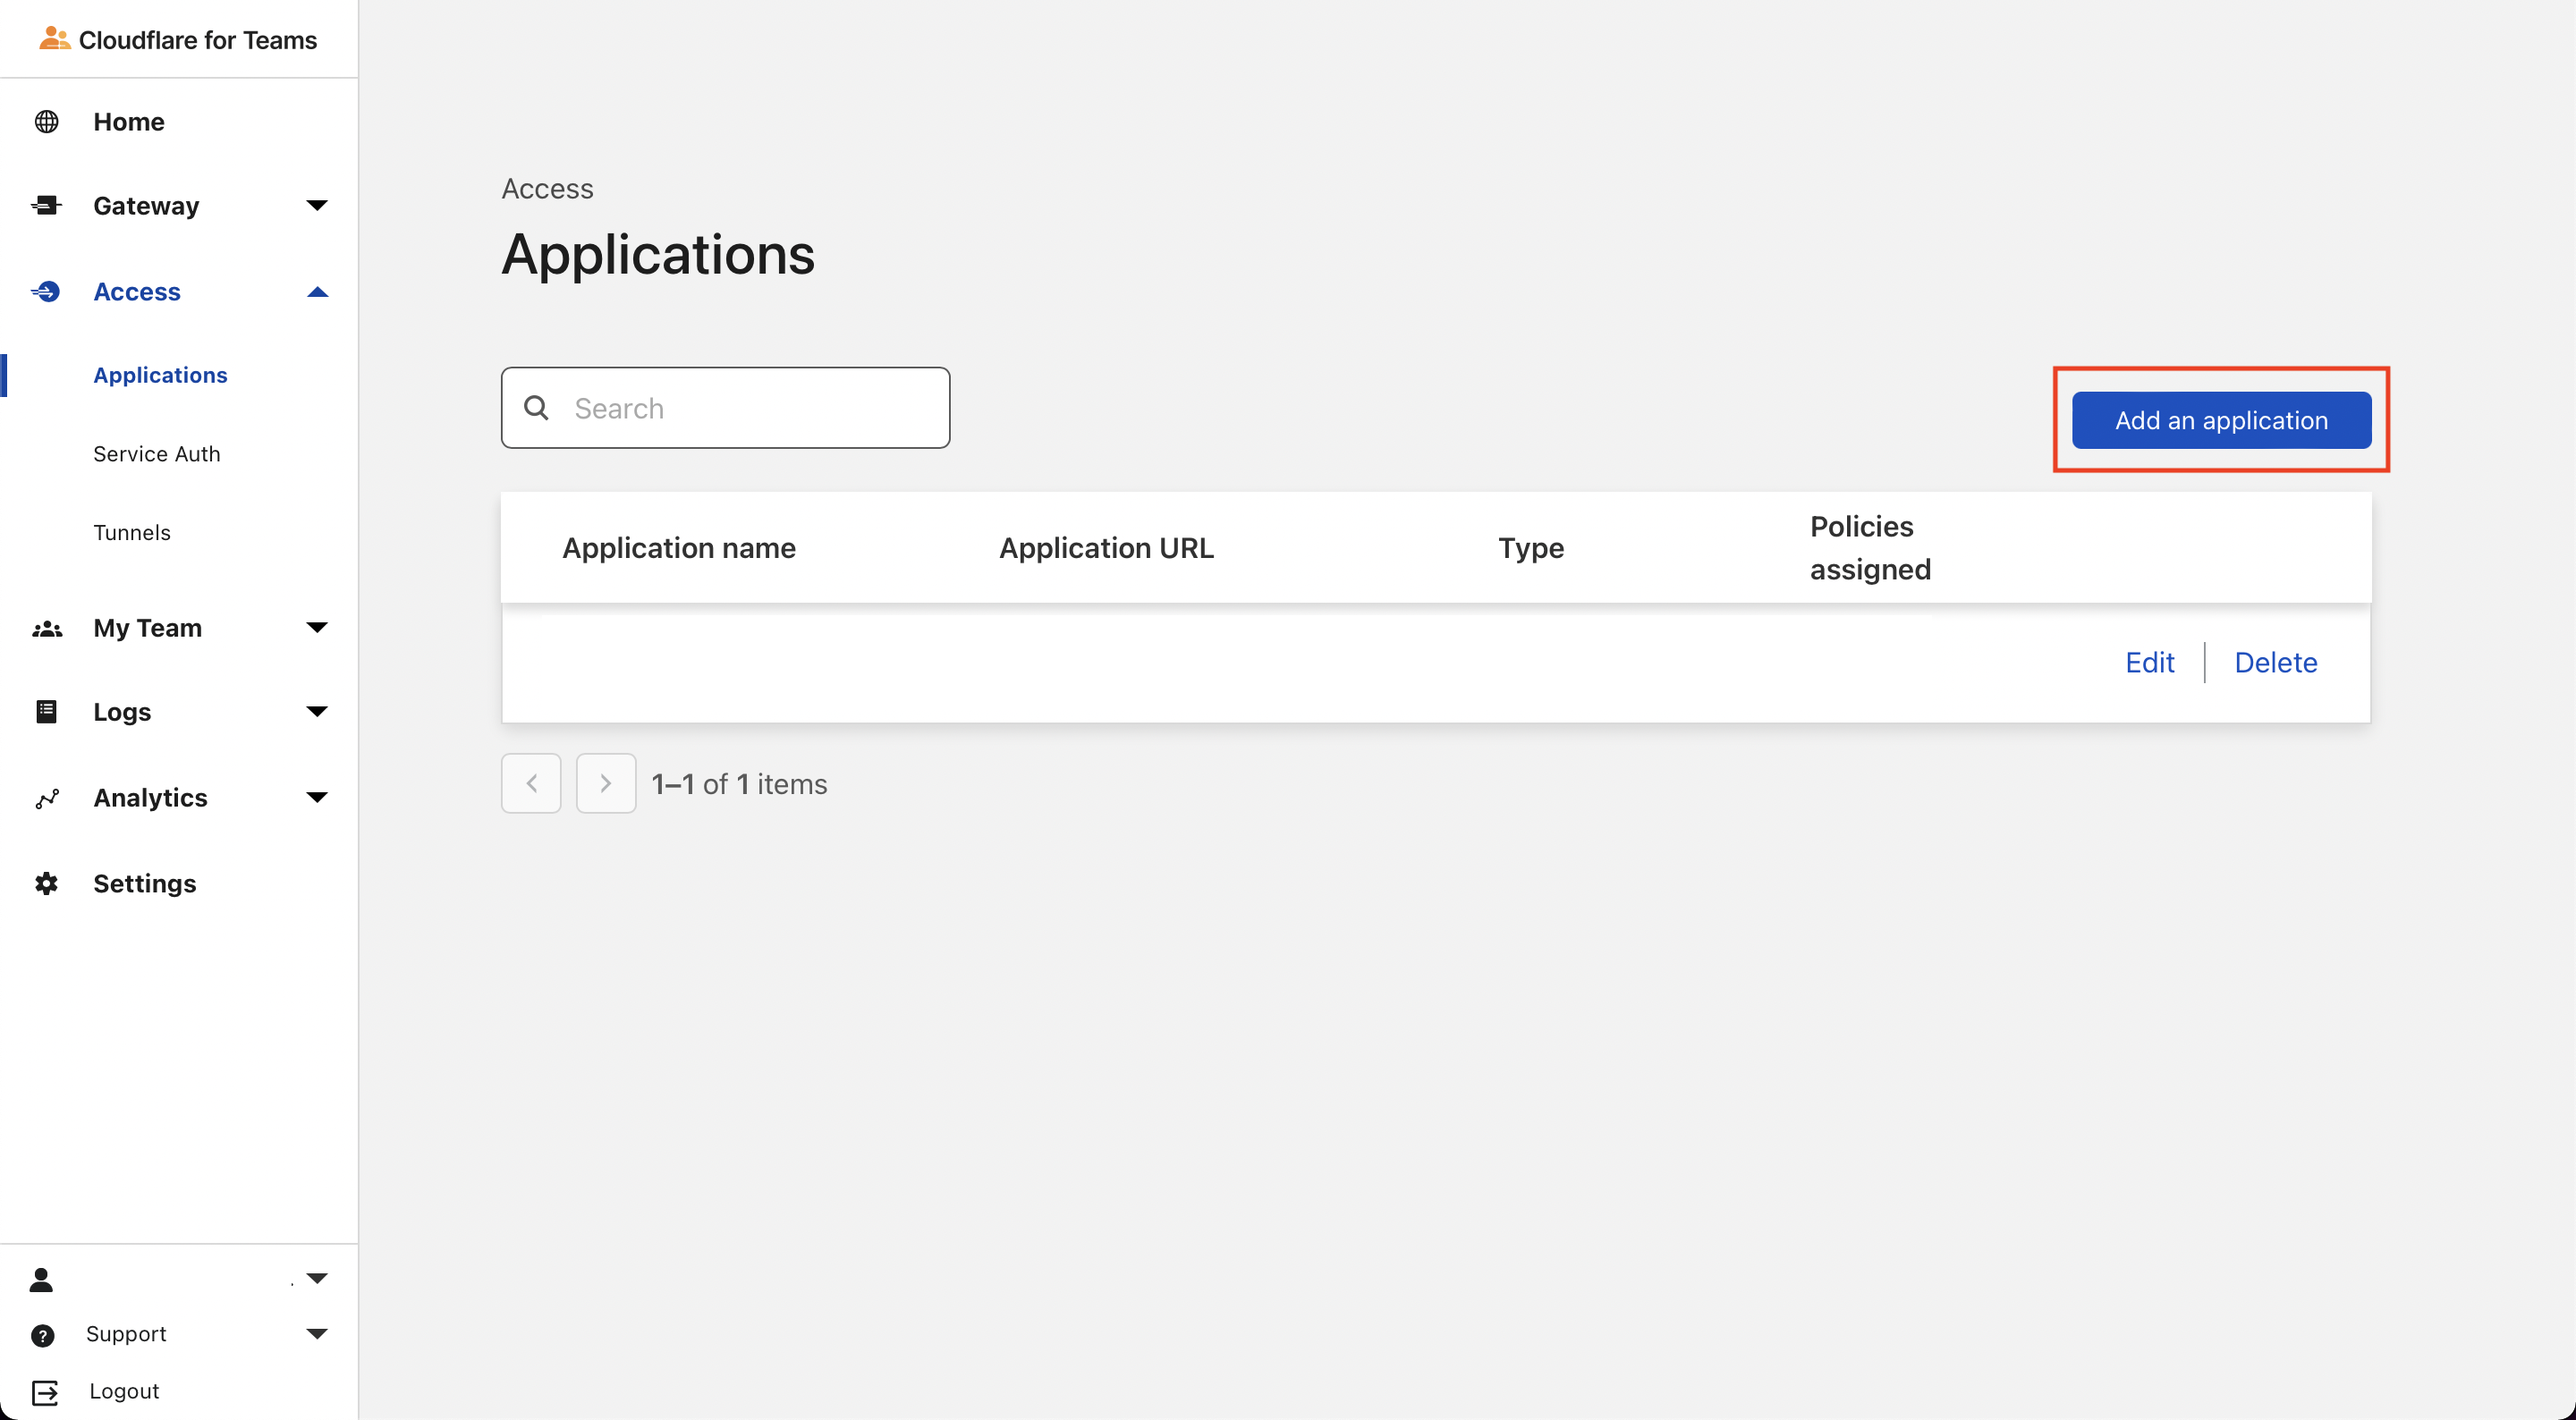 We will be manually adding the SSH application
- Select self-hosted
- Under
Application Configuration, key in the following:We will be using the defaultApplication name: <Anything> Session Duration: 30 minutes Application domain: test-ssh.hazmei.comOne-time PINunder Identity providers for simplicity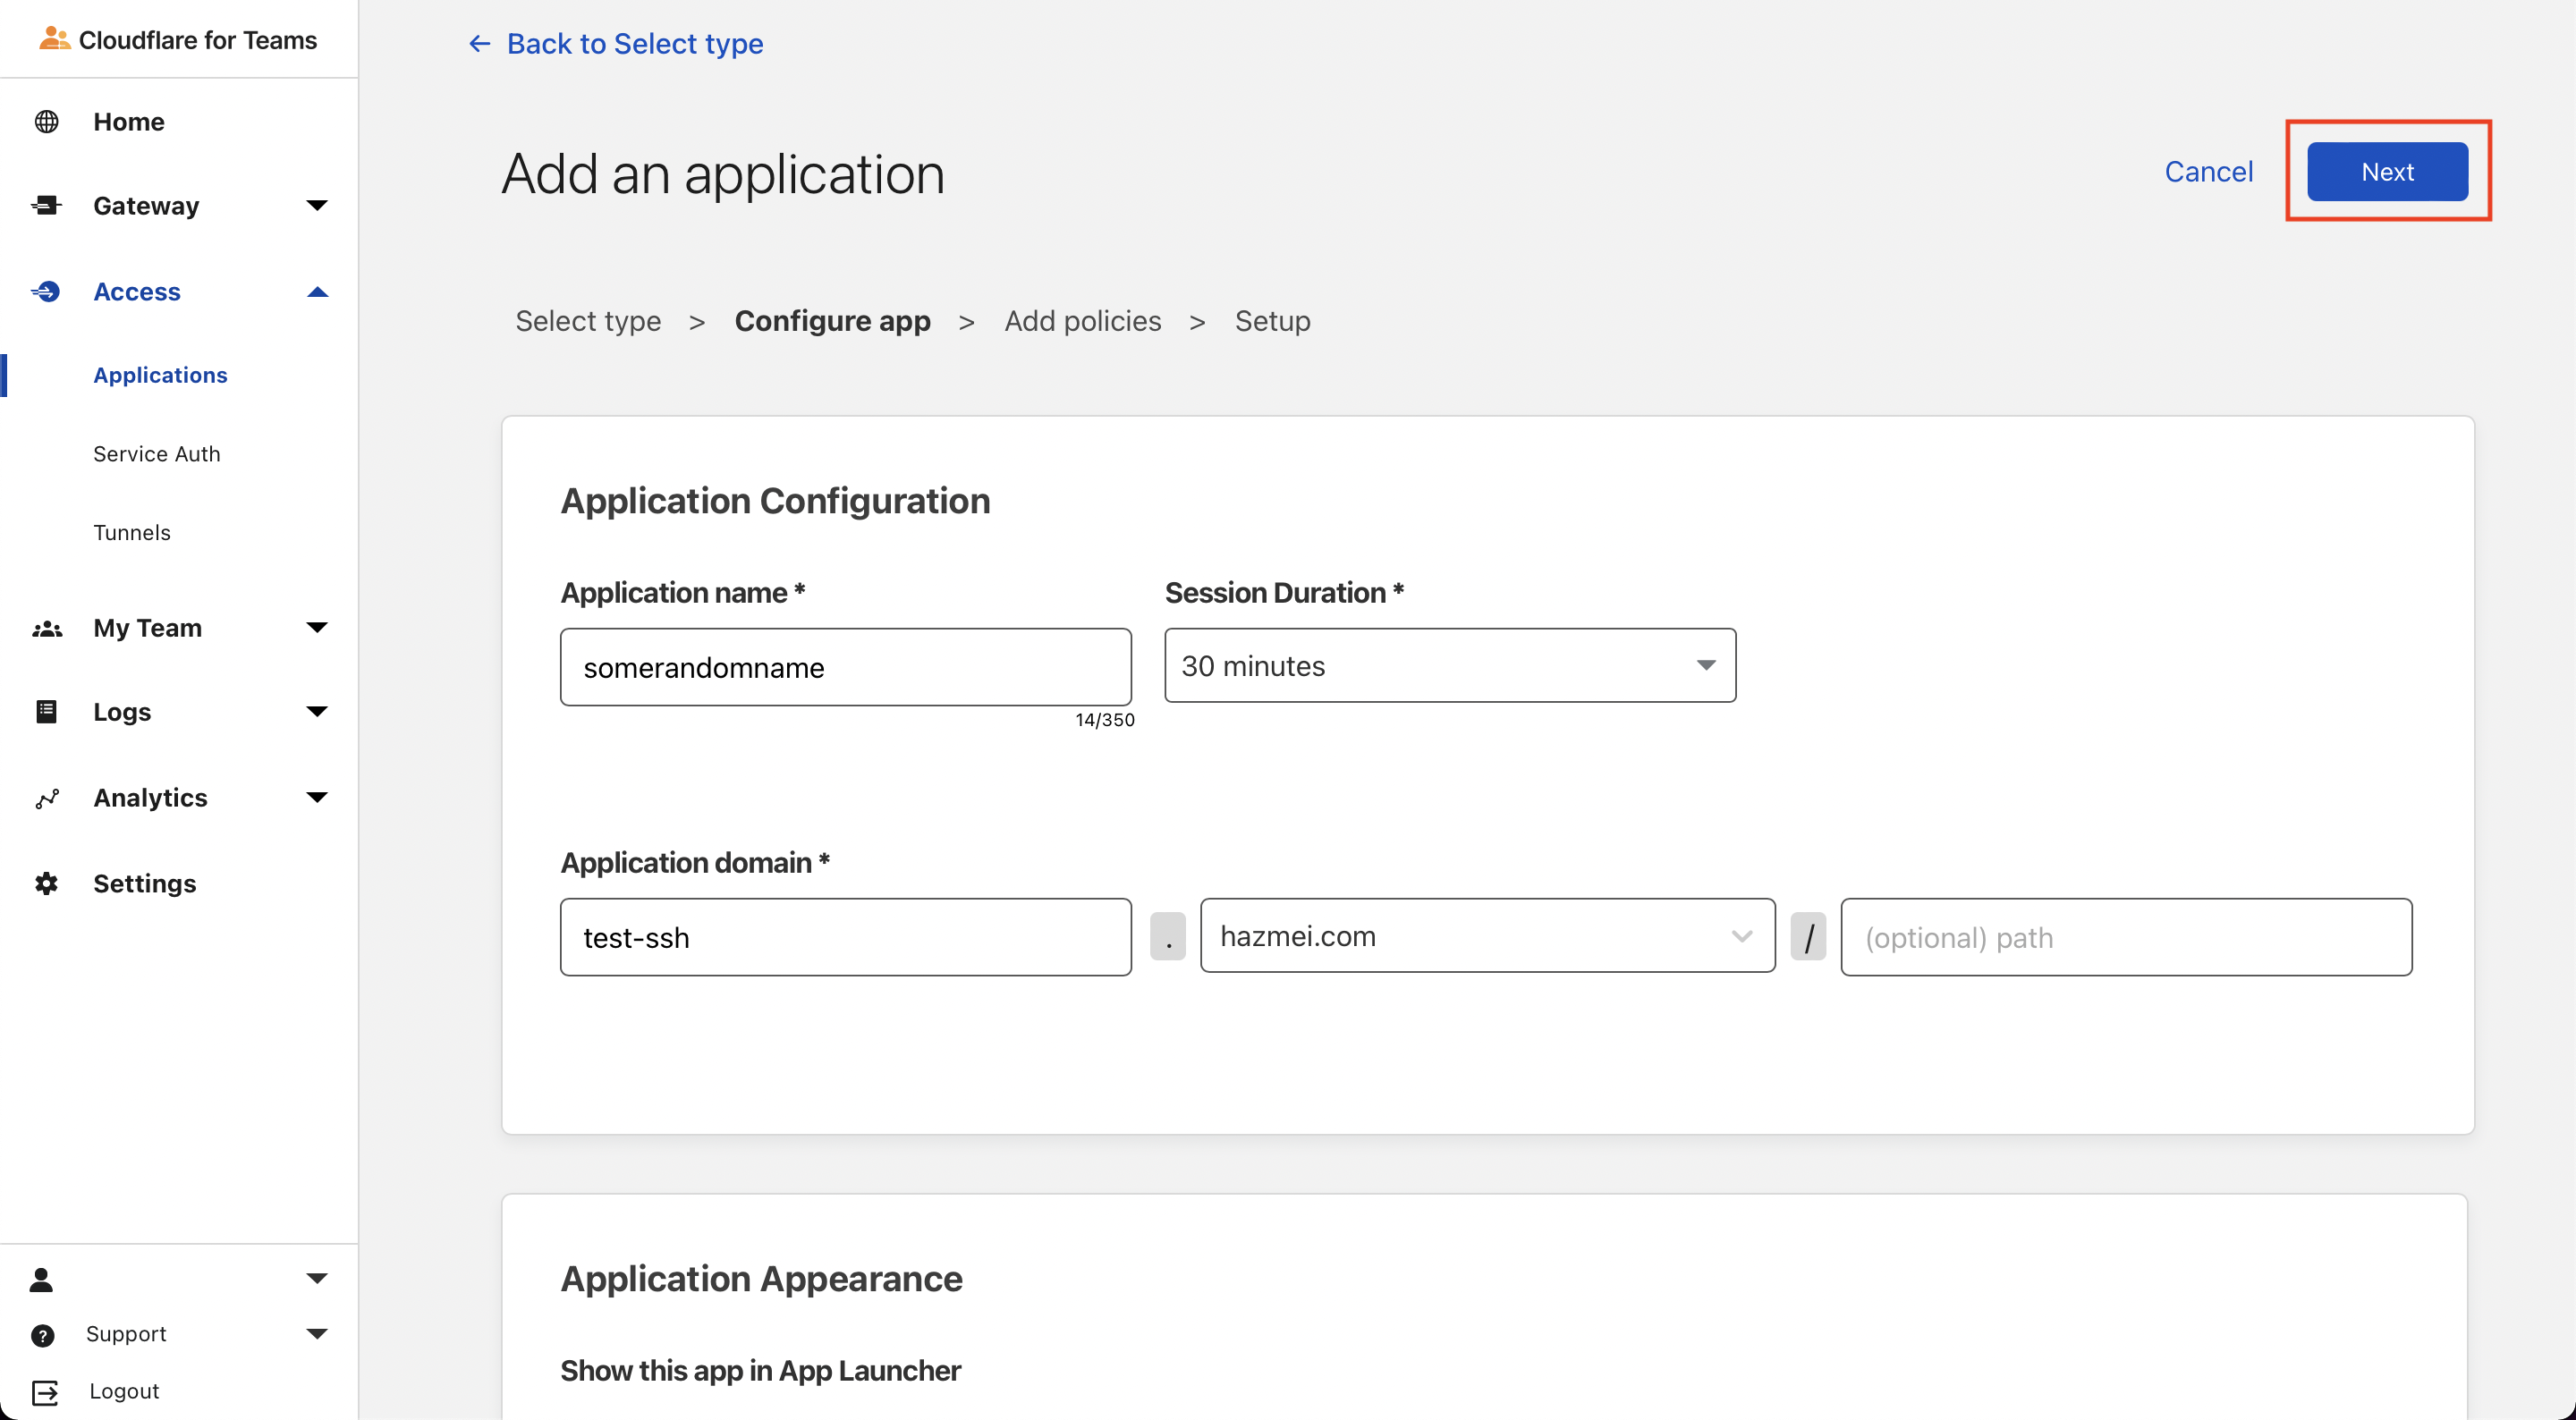
- Select self-hosted
- Click
NextHere we will define the policies for which kind of traffic to deny / allow to the application.Policy Name: <Anything> Action: Allow Assign the action to an Access Group and select Require under Rule type Under Create additional rules, include emails ending in your own domain or specific email.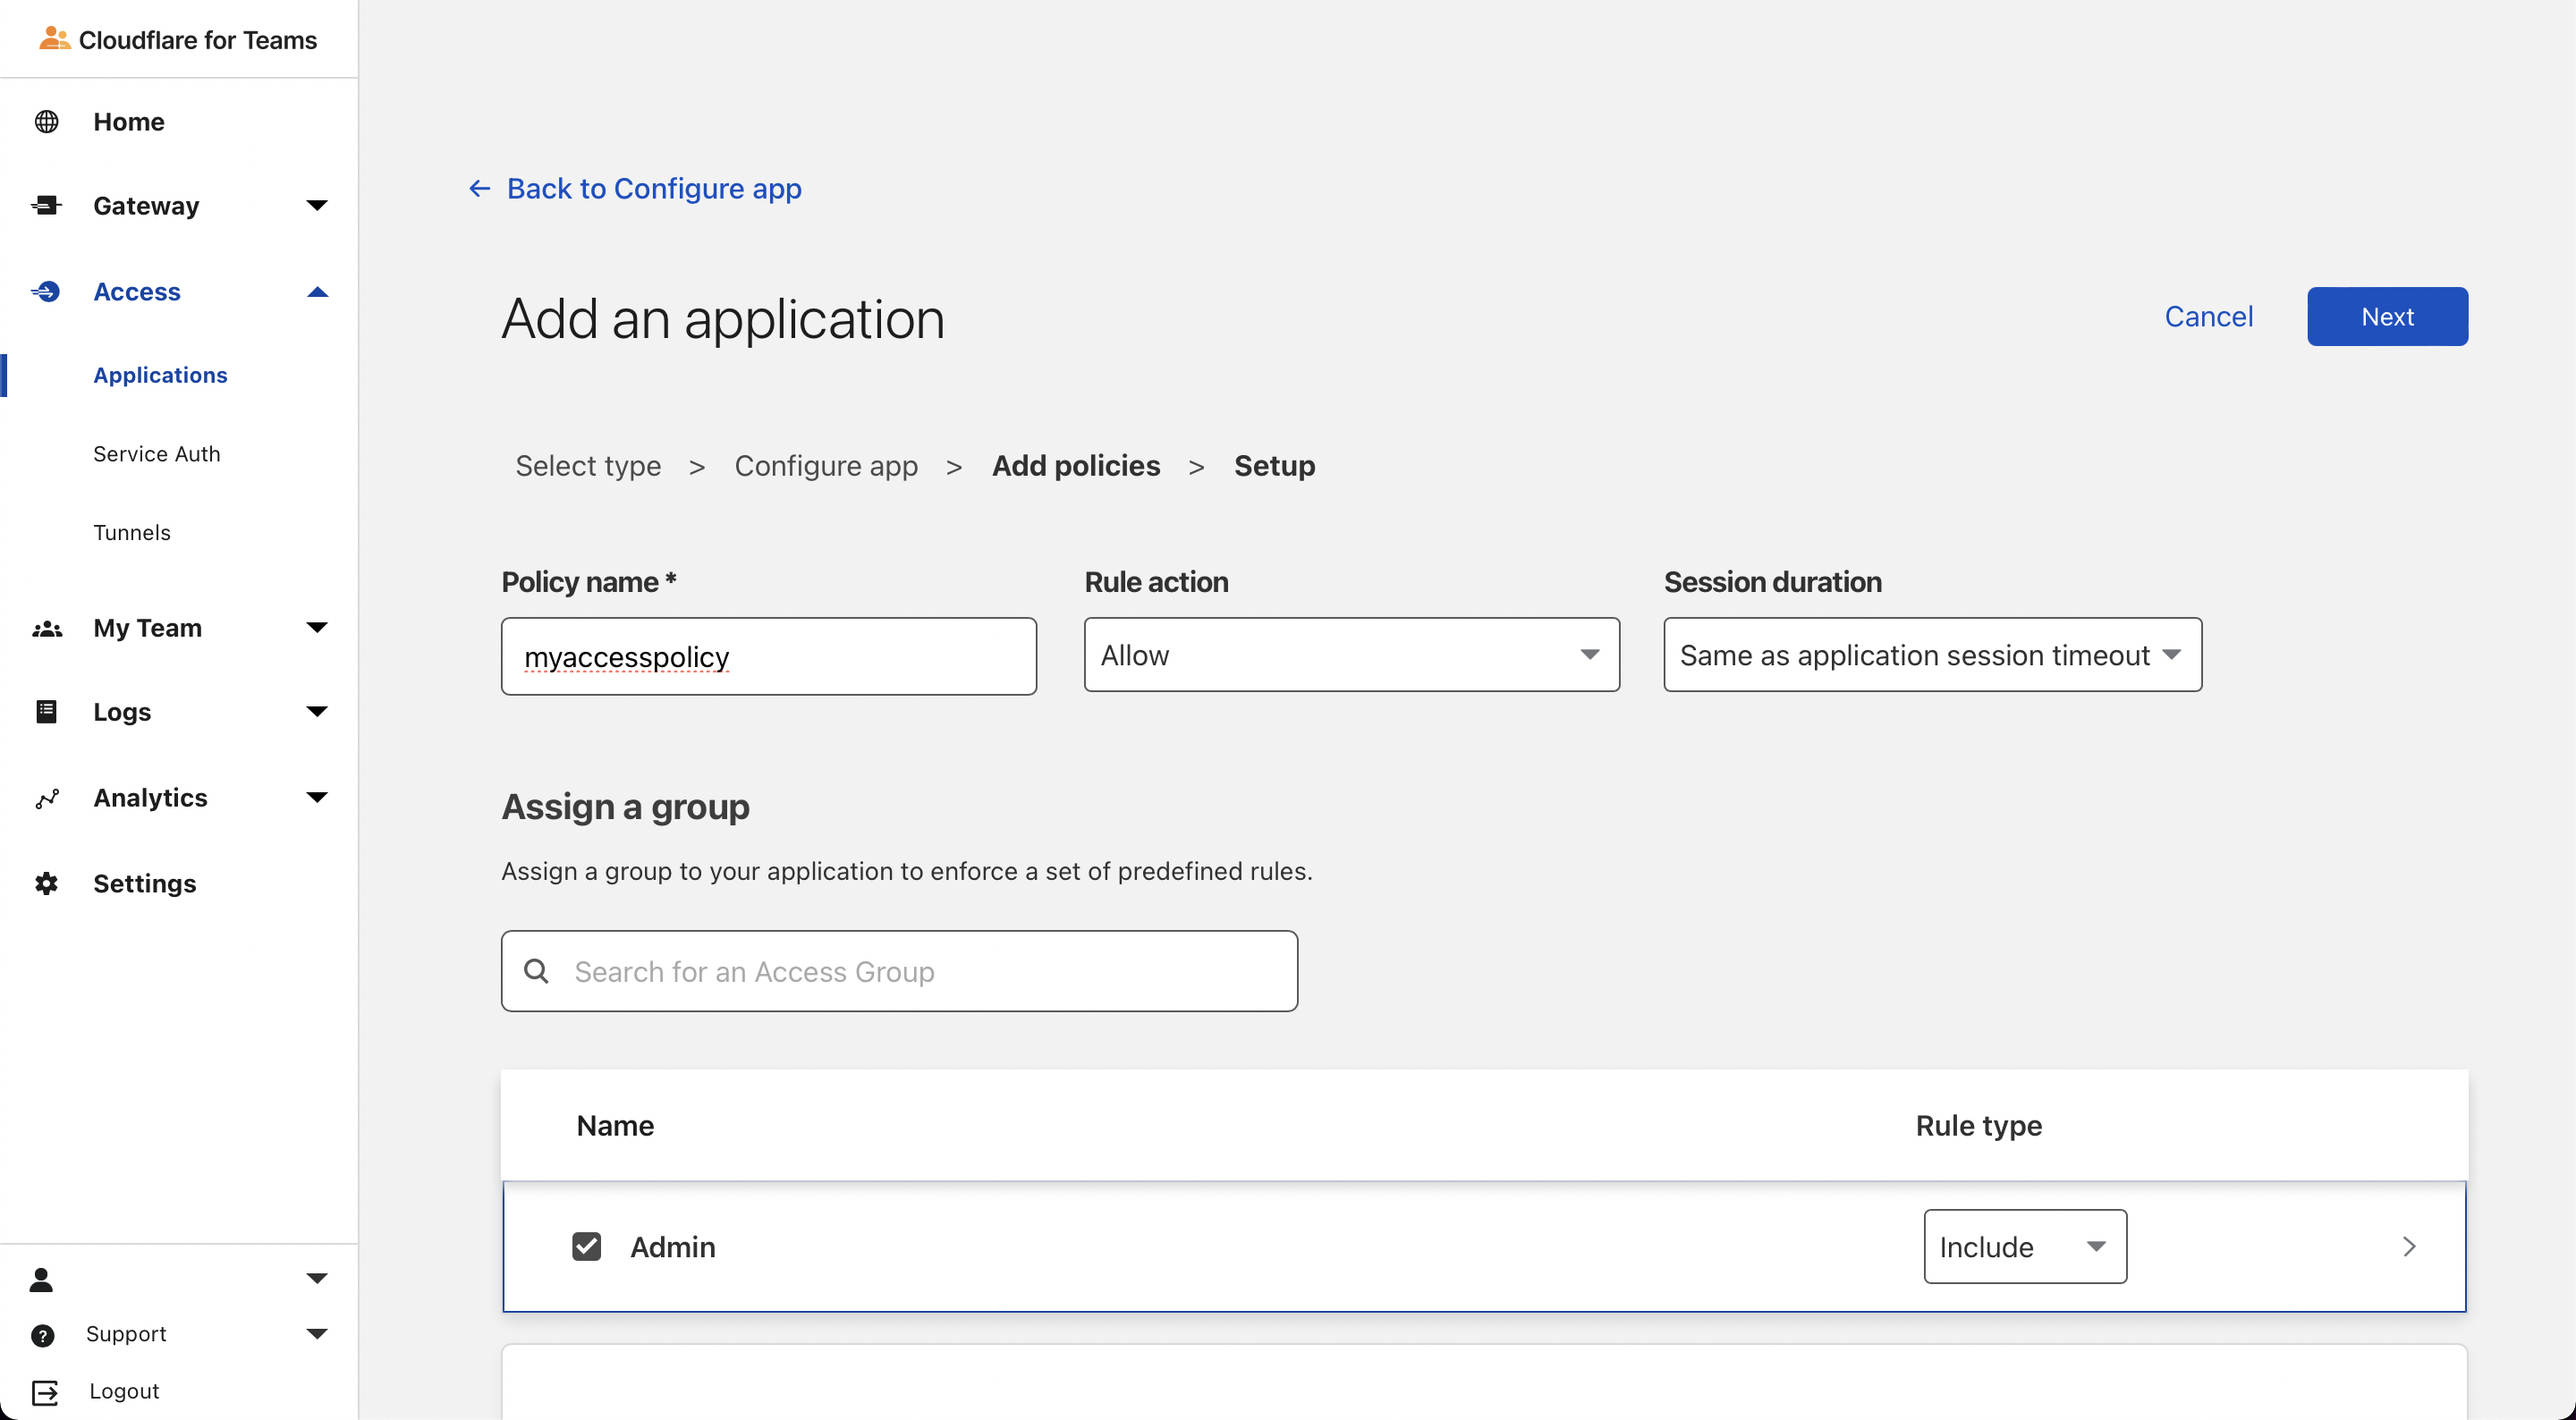
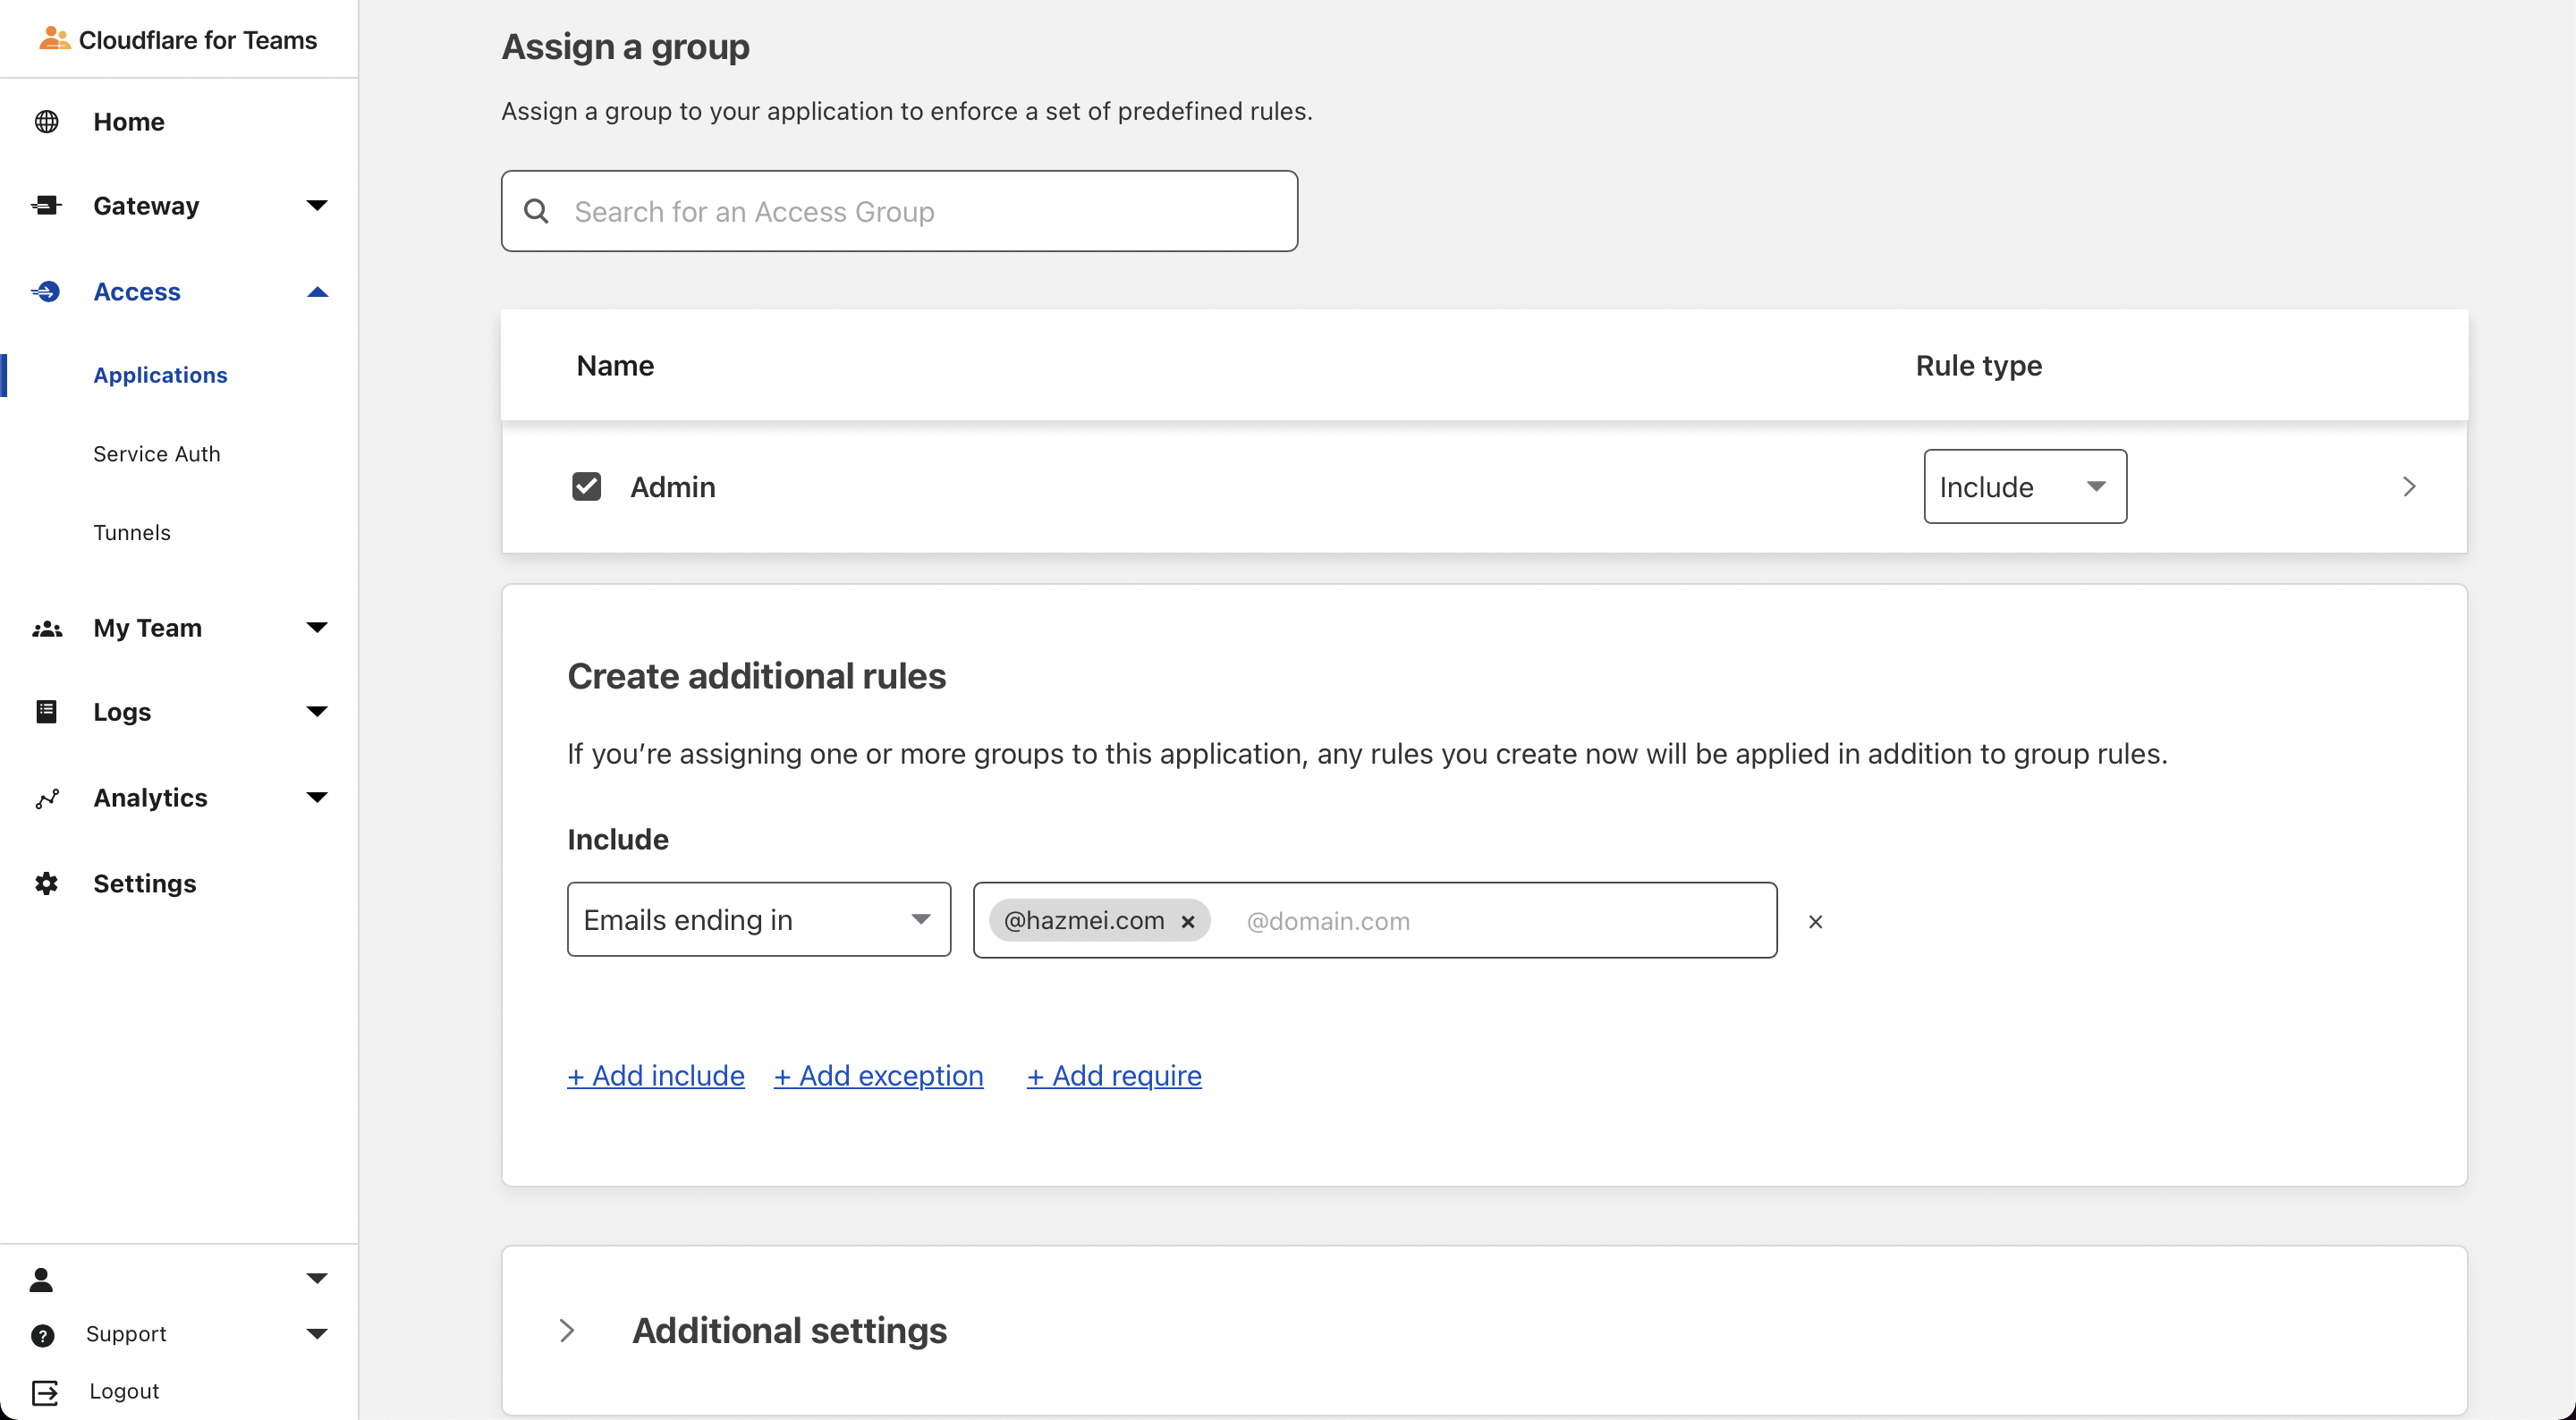
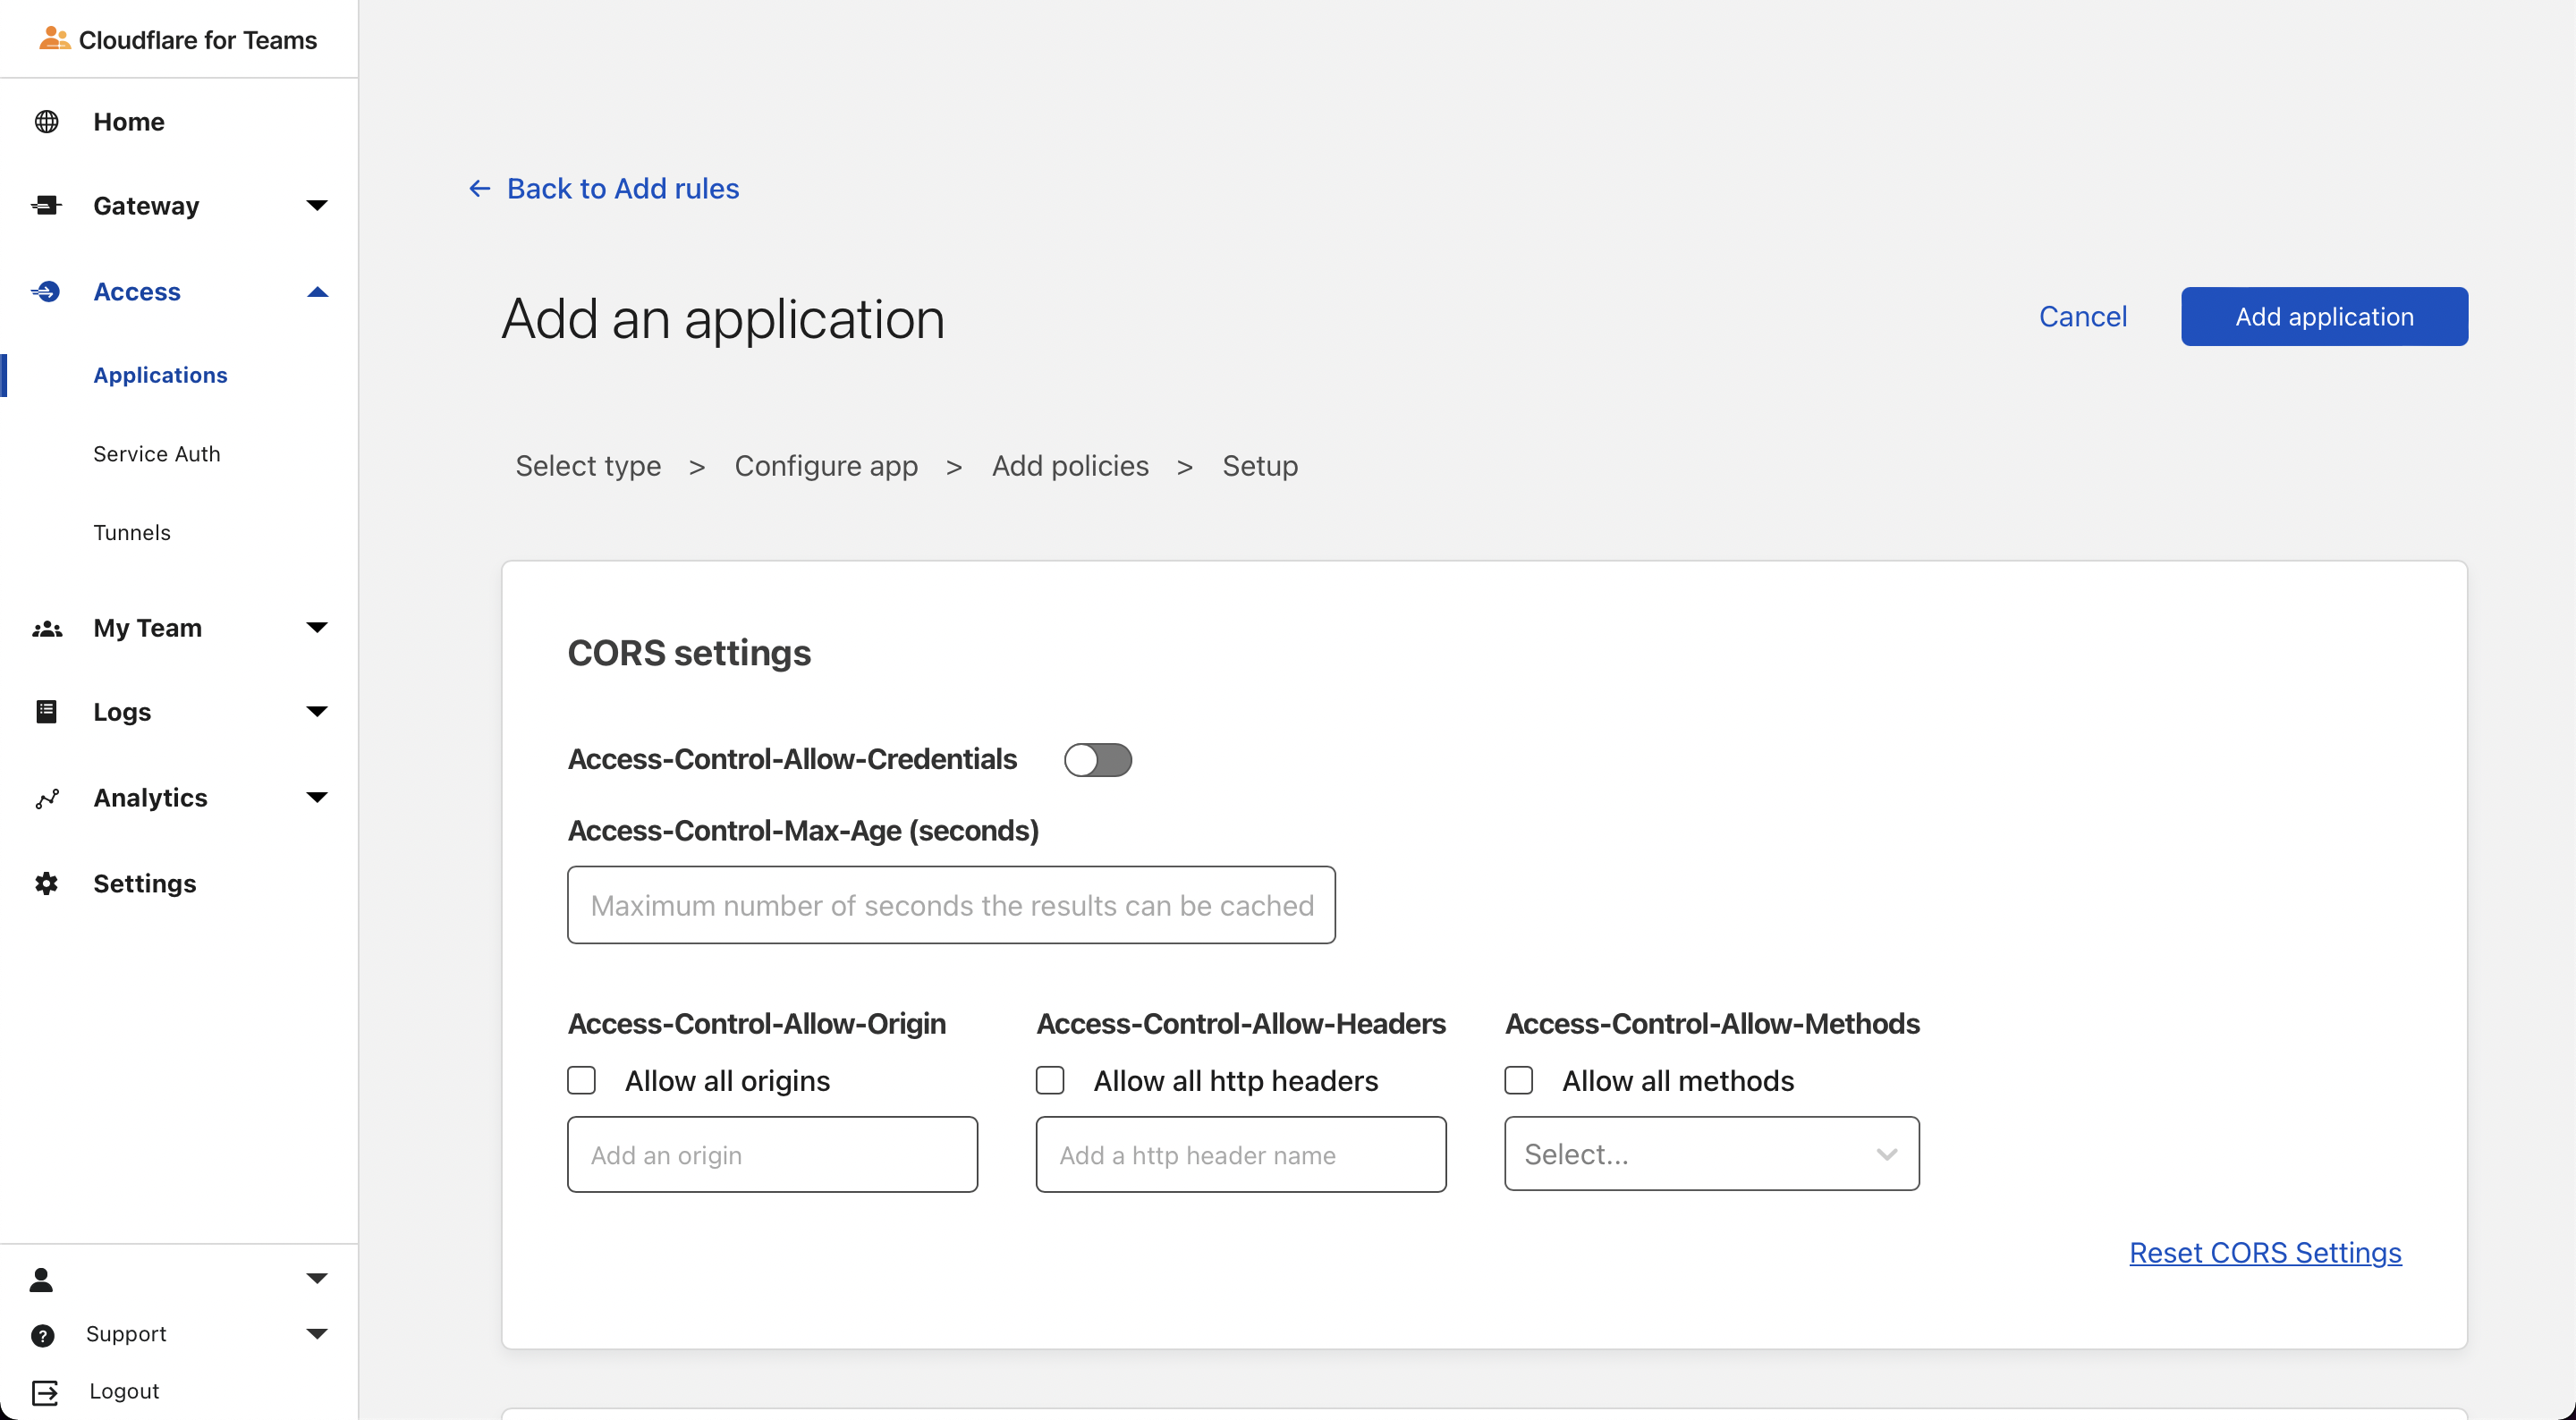
 Save the policy.
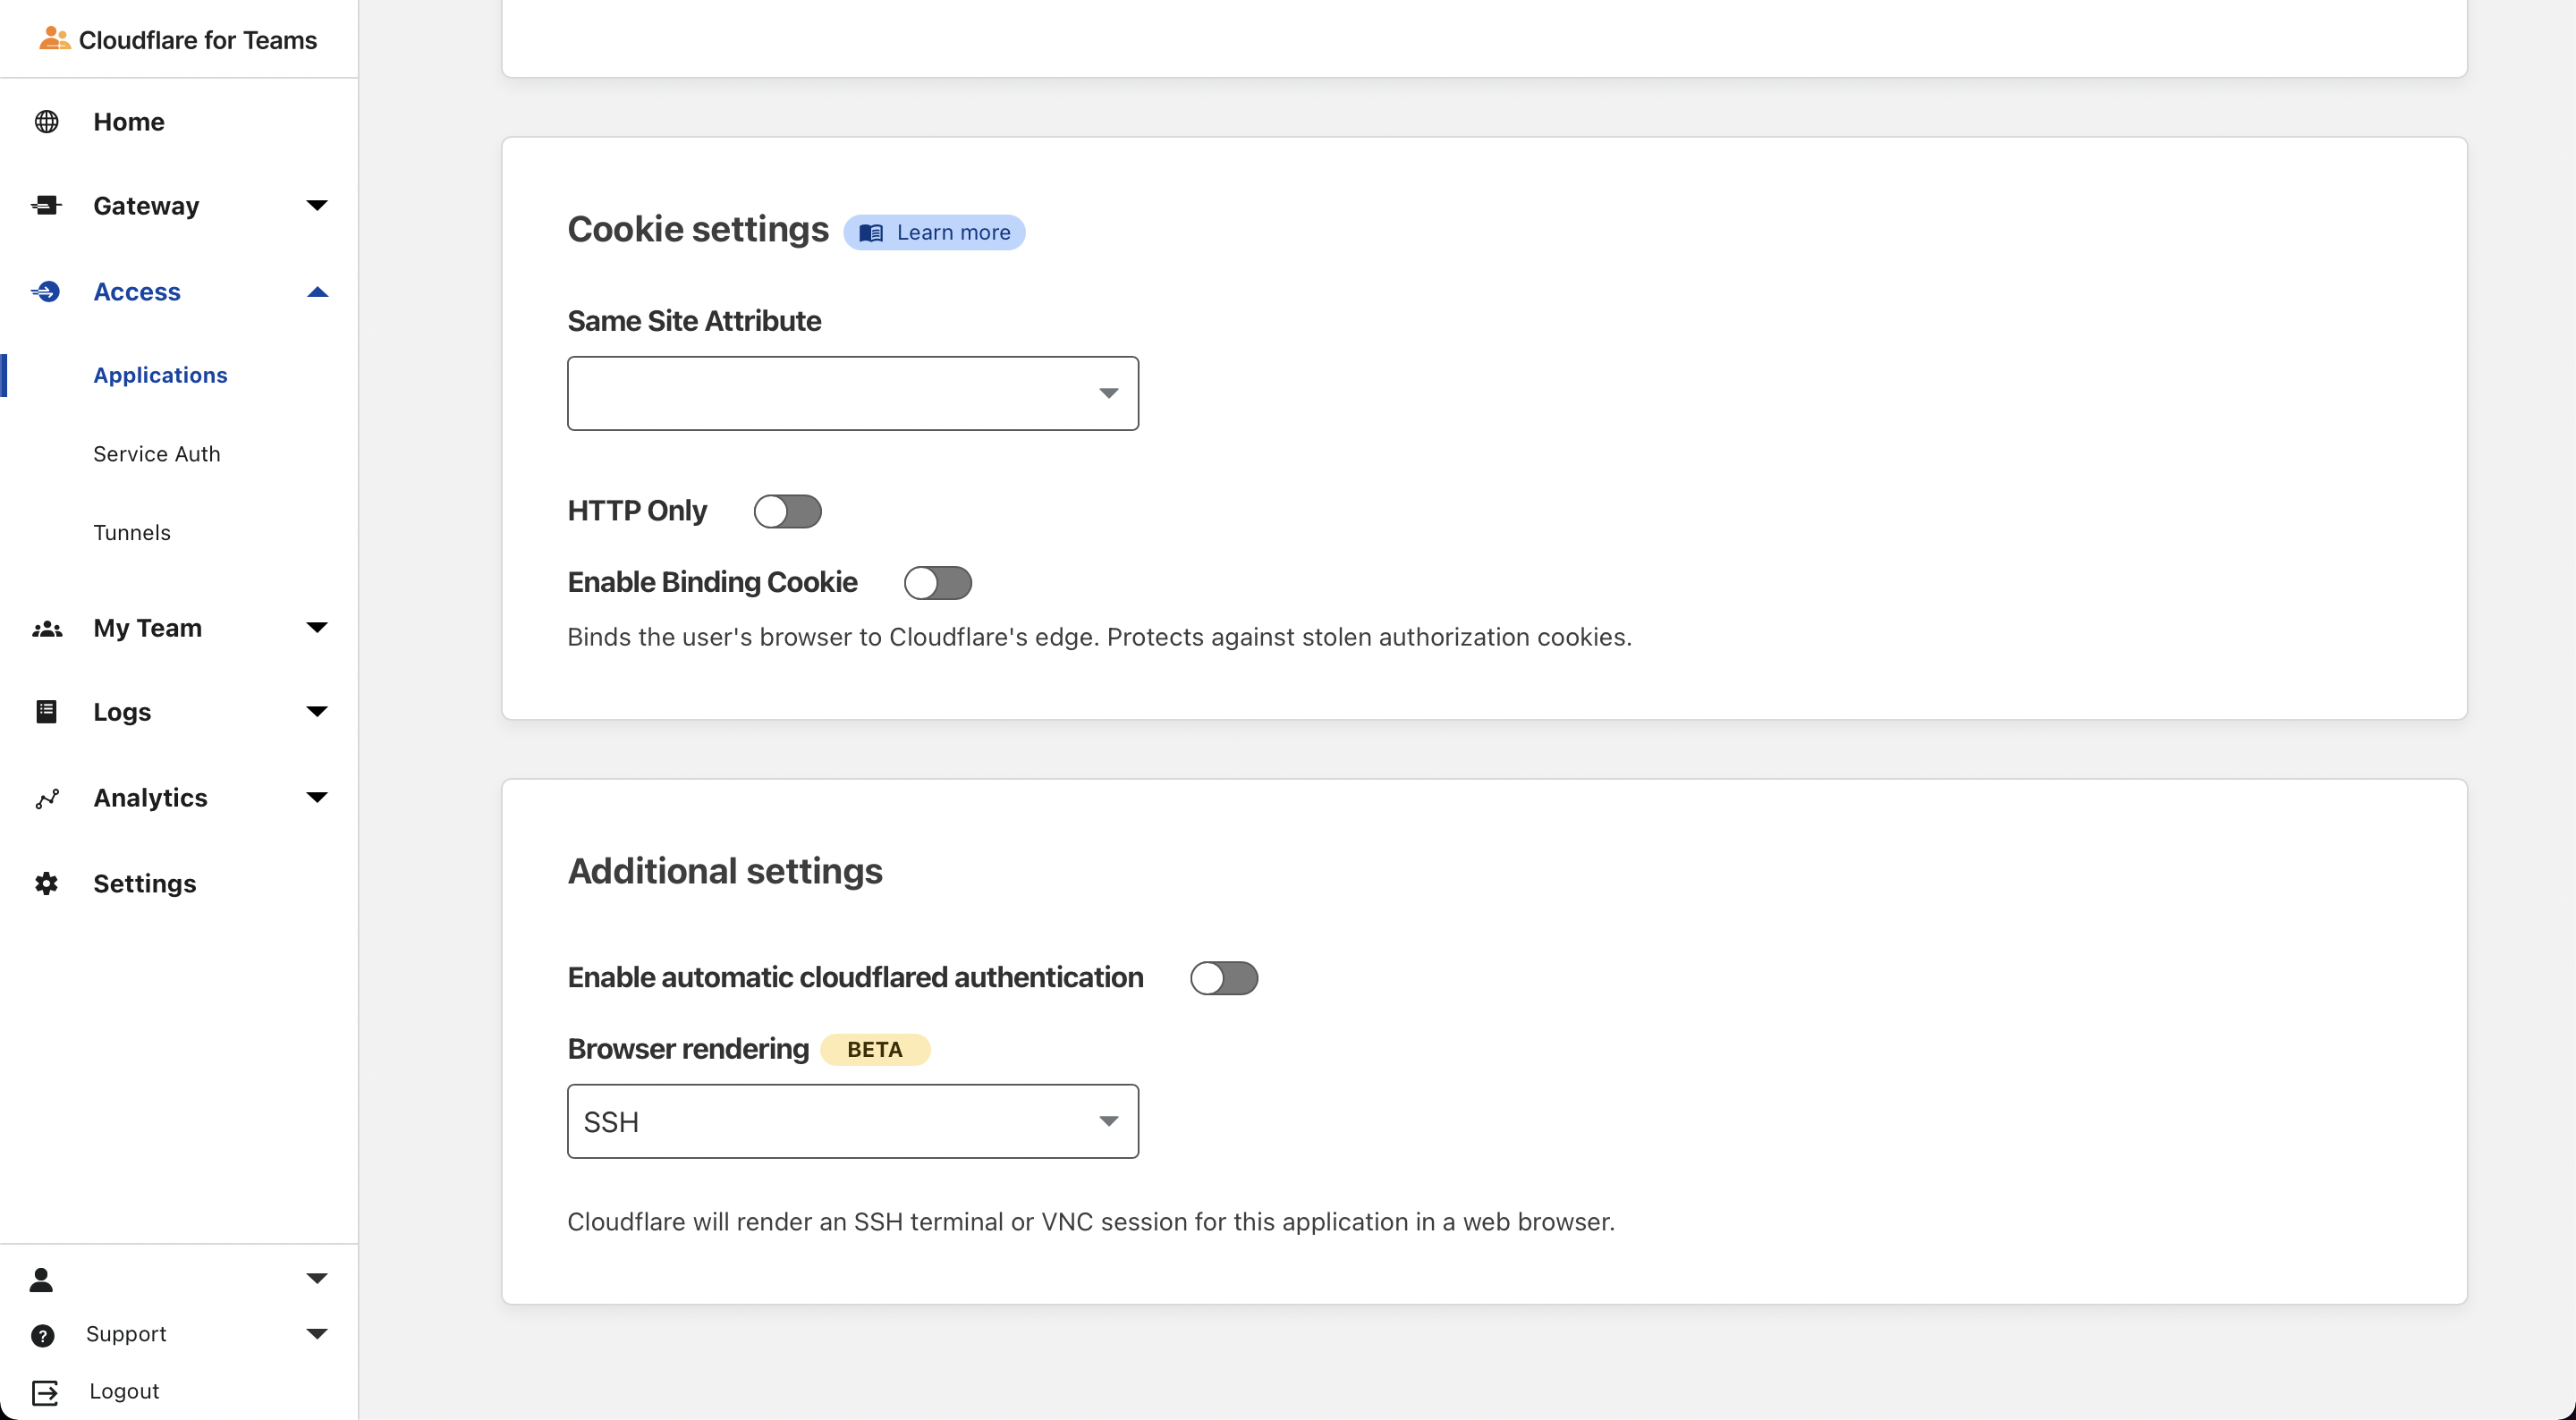
Sidenote: You can enable browser rendering for SSH but we’ll leave that disabled for this.
Save the policy.
Sidenote: You can enable browser rendering for SSH but we’ll leave that disabled for this.
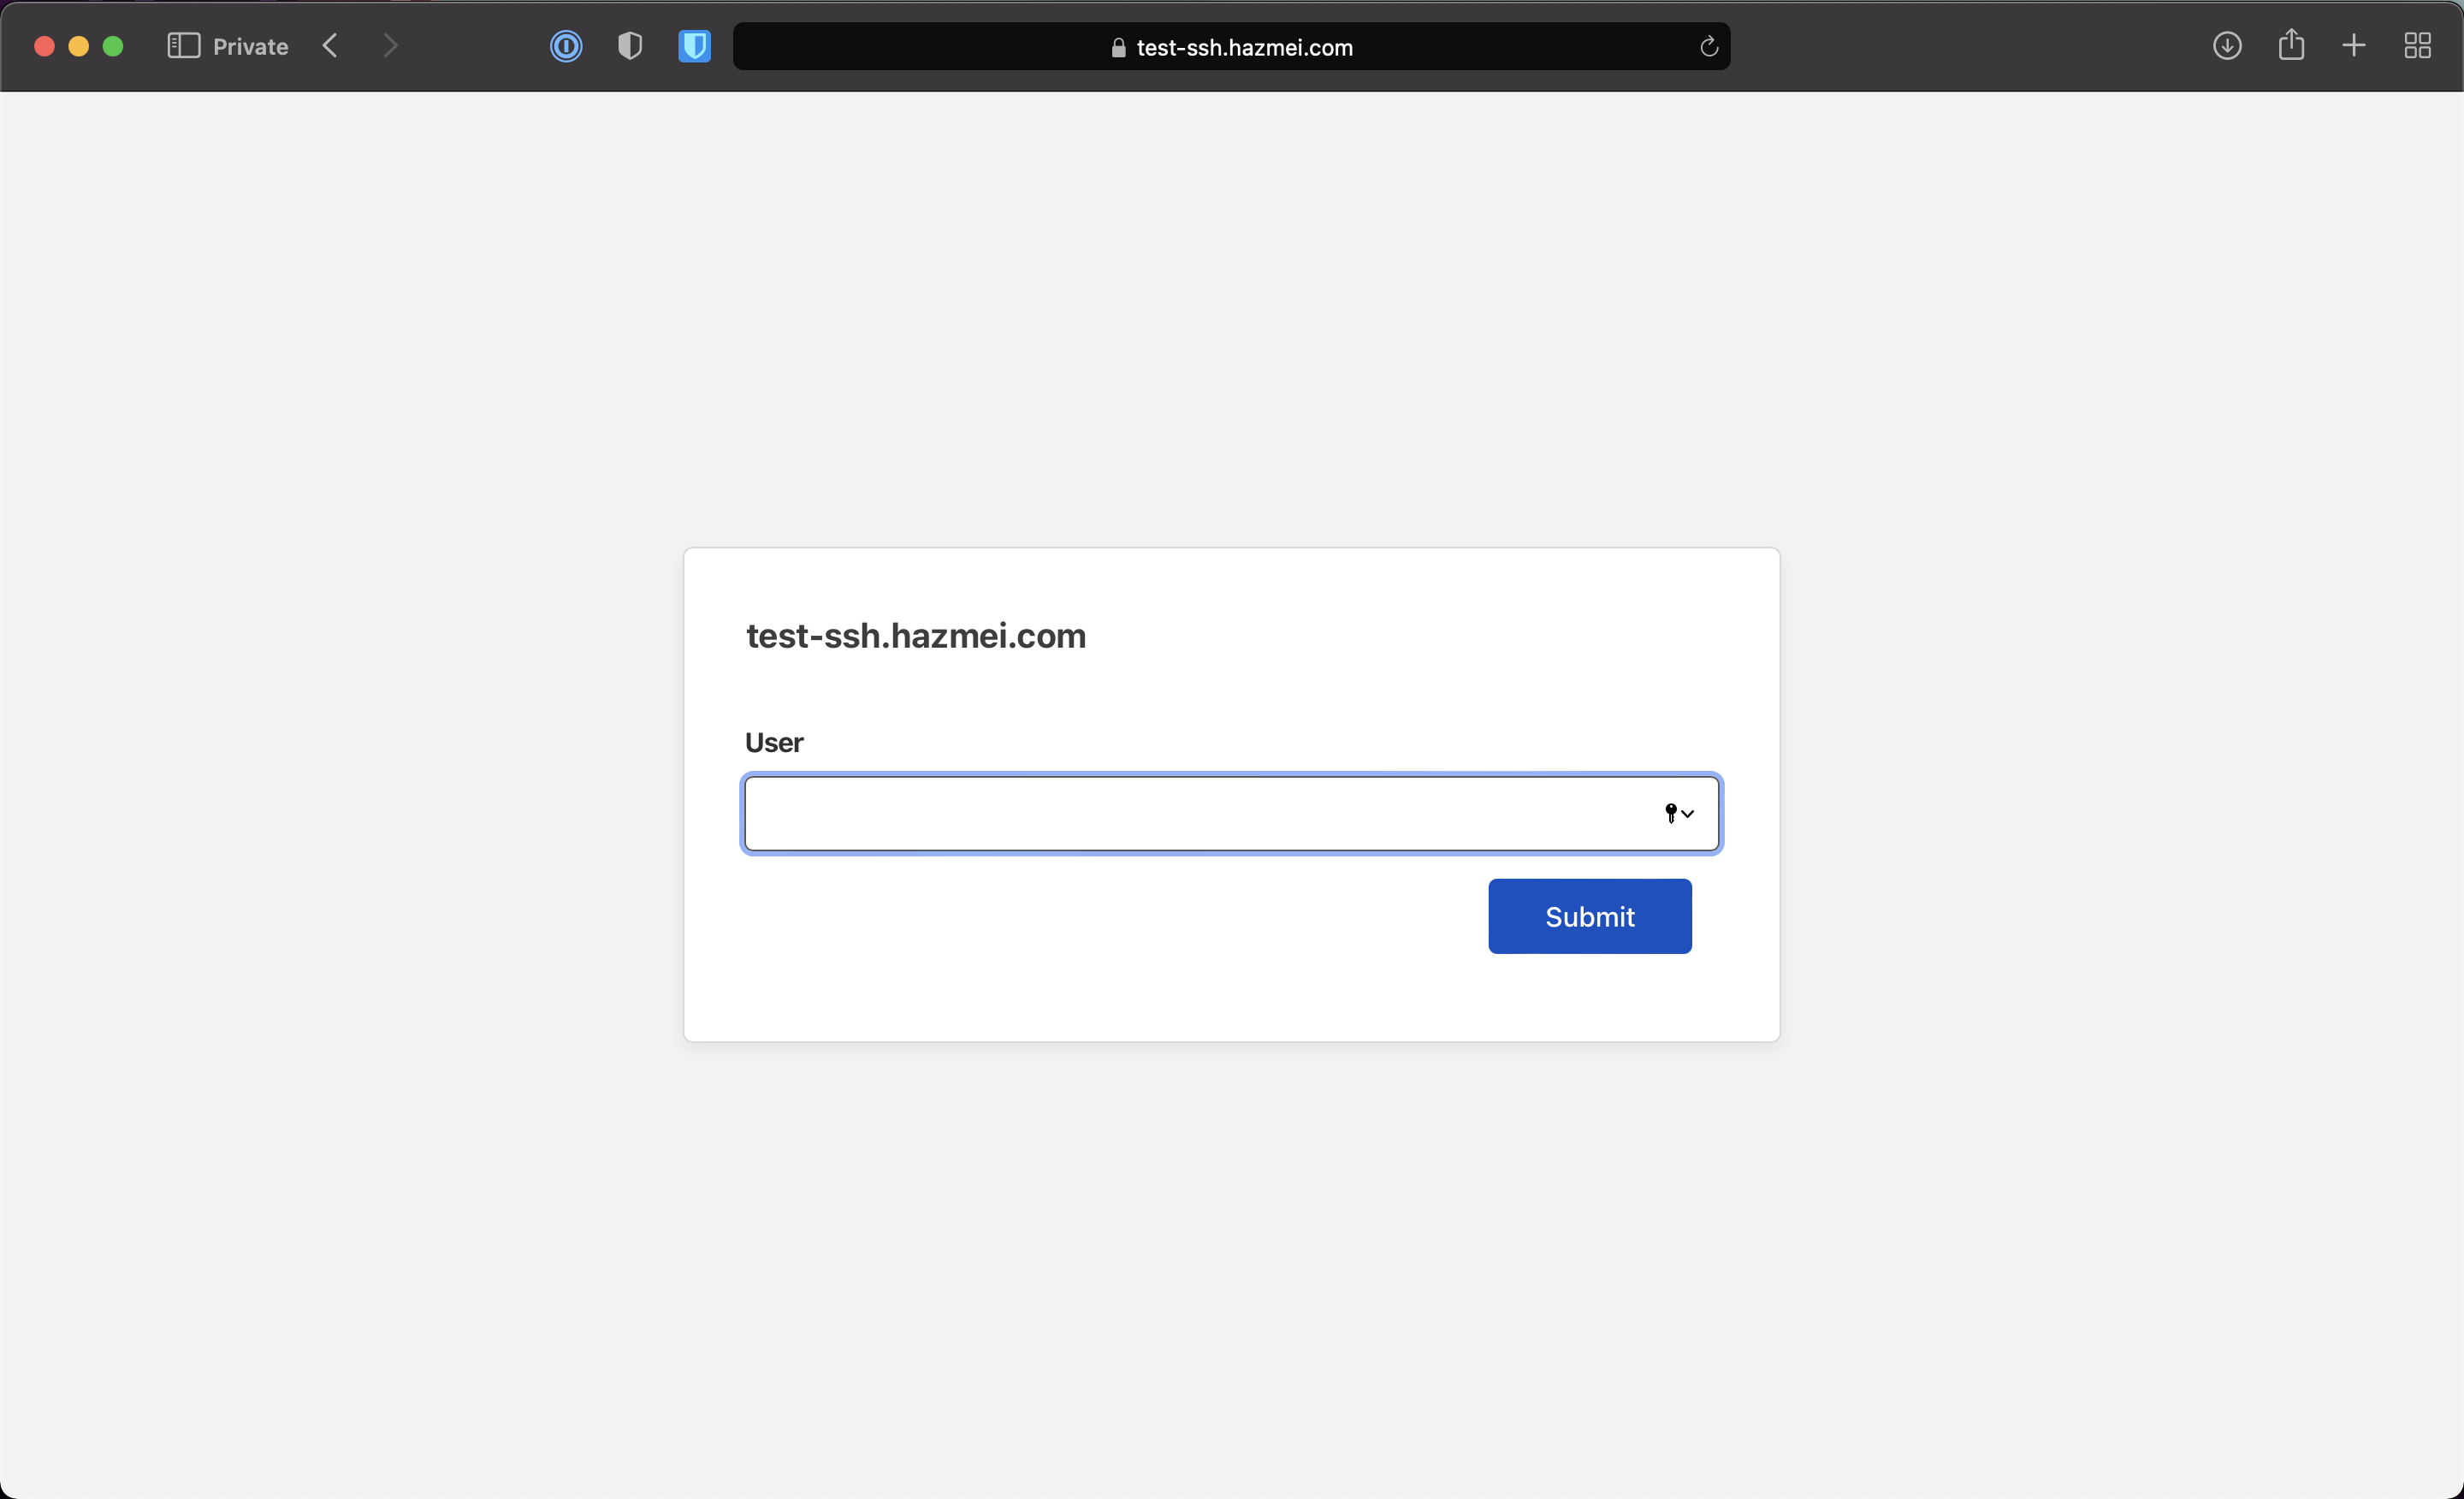
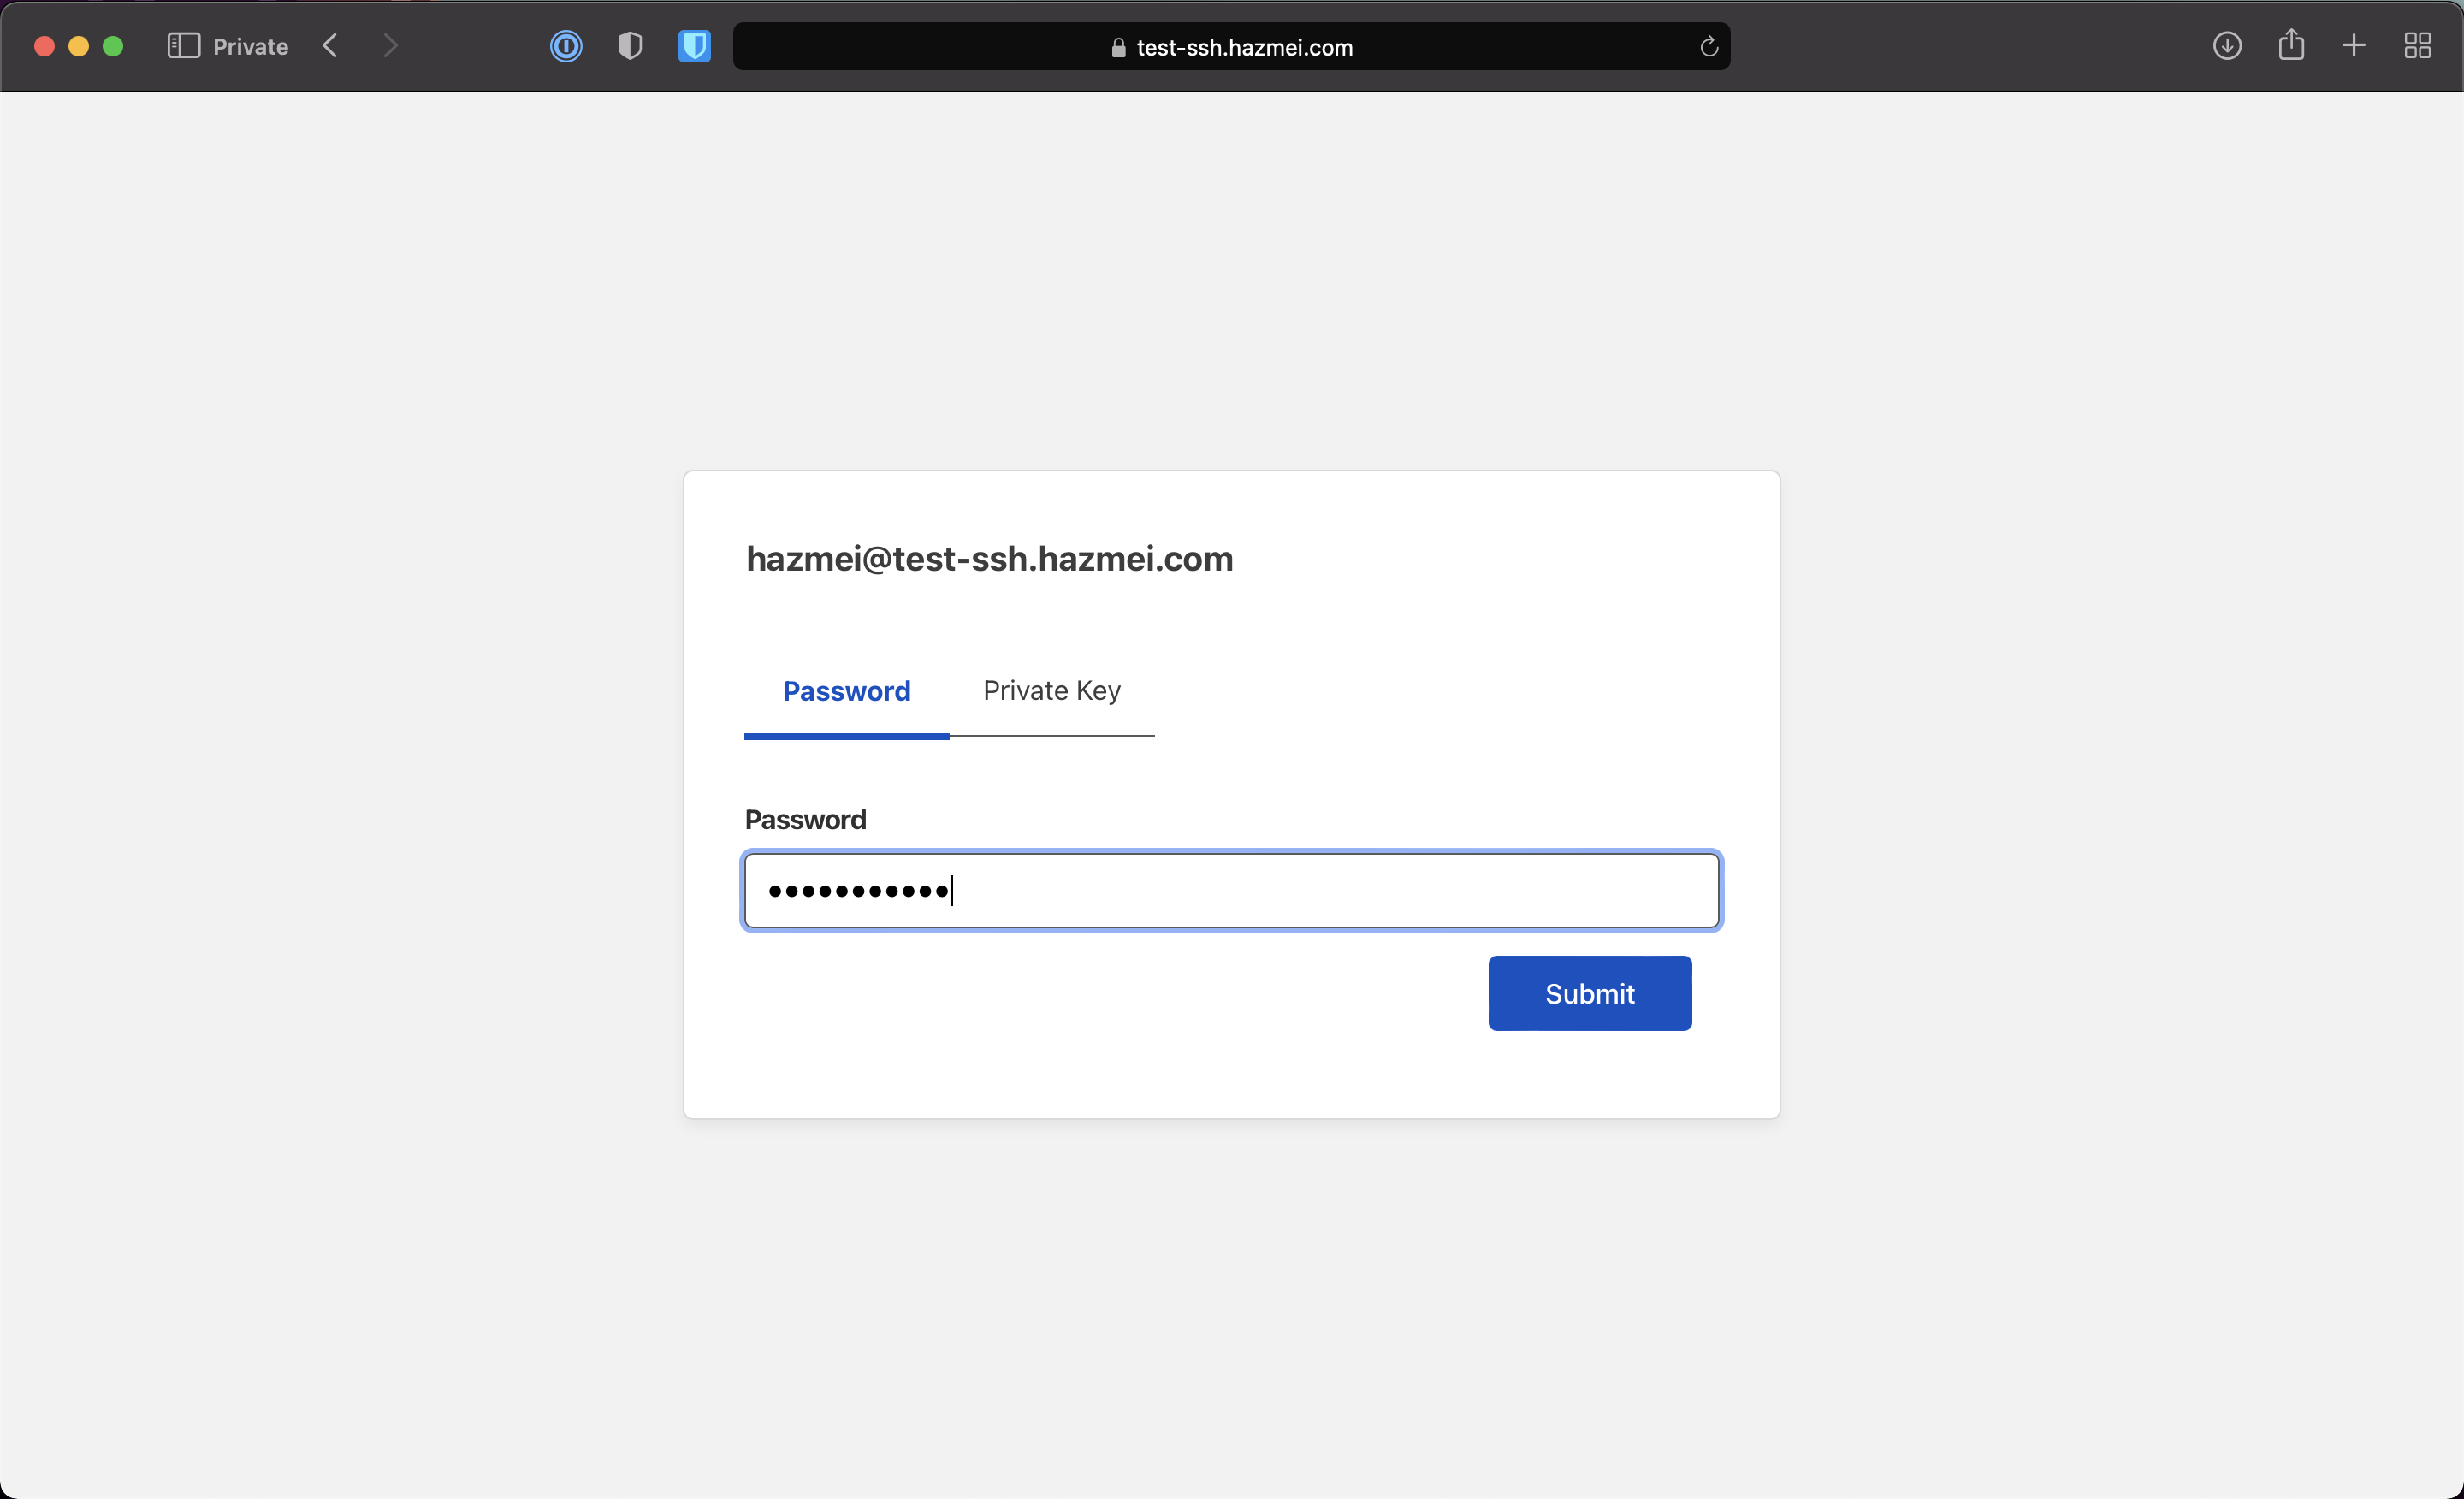
Accessing the application (SSH) Link to heading
Go to the application domain (in this case, it’s https://test-ssh.hazmei.com)
Note: You’ll be asked to key in an email address. Enter the whitelisted email.